In this step, you'll add a route to handle updating user records using SQL UPDATE.
Update 'app.py' by adding these routes after the /users route. This is the full code to add:
@app.route('/edit_user/<int:user_id>', methods=['GET'])
def edit_user(user_id):
    conn = sqlite3.connect('users.db')
    c = conn.cursor()
    c.execute("SELECT u.id, u.name, u.age, u.email, h.name, u.hobby_id FROM users u LEFT JOIN hobbies h ON u.hobby_id = h.id WHERE u.id = ?", (user_id,))
    user = c.fetchone()
    c.execute("SELECT * FROM hobbies")
    hobbies = c.fetchall()
    conn.close()
    if user:
        return render_template('edit_user.html', user=user, hobbies=hobbies)
    return 'User not found', 404

@app.route('/update_user/<int:user_id>', methods=['POST'])
def update_user(user_id):
    name = request.form['name']
    age = int(request.form['age'])
    email = request.form.get('email', '')
    hobby_id = request.form.get('hobby_id')
    hobby_id = int(hobby_id) if hobby_id else None
    conn = sqlite3.connect('users.db')
    c = conn.cursor()
    c.execute("UPDATE users SET name = ?, age = ?, email = ?, hobby_id = ? WHERE id = ?", (name, age, email, hobby_id, user_id))
    conn.commit()
    conn.close()
    return redirect('/users')
You'll also need to import redirect at the top, so that you can redirect to other routes after operations.
from flask import Flask, render_template, request, redirect
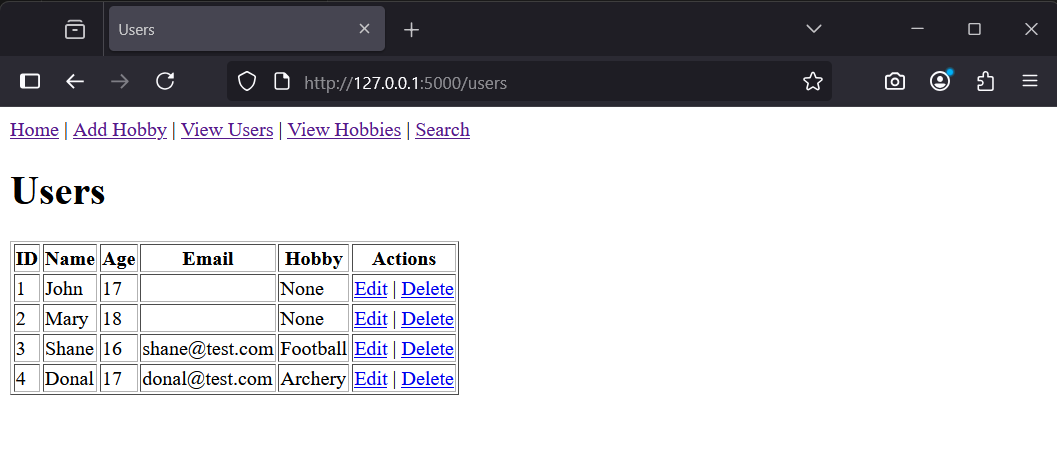
Run python app.py. Visit http://127.0.0.1:5000/users, click 'Edit' for a user, update details, and submit. You should be redirected to the users list with updated data.
Let's break down some key parts of this code:
Routing with the ID: The routes use /edit_user/<int:user_id> and /update_user/<int:user_id>. The <int:user_id> is a dynamic part of the URL that captures the user's ID as an integer. This ID is passed to the function (e.g., def edit_user(user_id):) so you can use it to query or update the specific user in the database.
Getting values from the form: In the update_user function, we use request.form['name'], request.form['age'], etc., to get the data submitted from the edit form. These match the name attributes in the form fields. We convert types where needed, like int(request.form['age']), and handle optional fields with request.form.get('email', '').
The UPDATE statement: The SQL command UPDATE users SET name = ?, age = ?, email = ?, hobby_id = ? WHERE id = ? modifies the existing record in the 'users' table. It sets the new values for the specified columns, but only for the row where the id matches the provided user_id. The question marks (?) are placeholders for the values, which are safely inserted from the tuple (name, age, email, hobby_id, user_id) to prevent SQL injection.
 Chromebooks, laptops, and PCs are crucial tools for coding and digital skills education. Chromebooks are ideal for web-based applications and collaborative projects, while laptops and PCs support a wider range of programming environments and software for more intensive tasks like software development and data analysis.
 In this lesson, you'll extend your Flask app to update and delete records in your SQLite database. This completes the CRUD (Create, Read, Update, Delete) functionality, allowing you to modify existing data.
 The SQL UPDATE statement allows you to modify existing data in a database table. It's a key part of managing information, letting you change details without deleting and re-adding records.