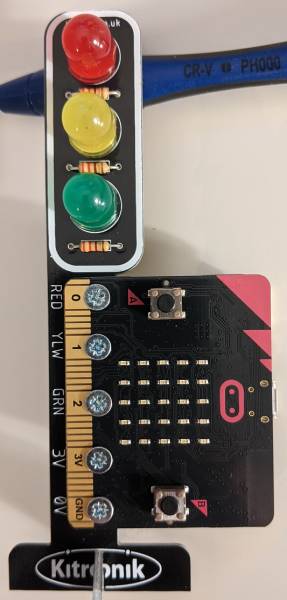
In this game, you'll create a traffic light reaction game using your micro:bit and STOP:bit Traffic Lights.
The game works like this: when the STOP:bit traffic light turns green, you have to press a button on your micro:bit as quickly as possible. The micro:bit will measure your reaction time and display it on its LED matrix. You can challenge your friends to see who has the fastest reaction time!
Make sure to attach the STOP:bit traffic lights to your micro:bit before starting the project.
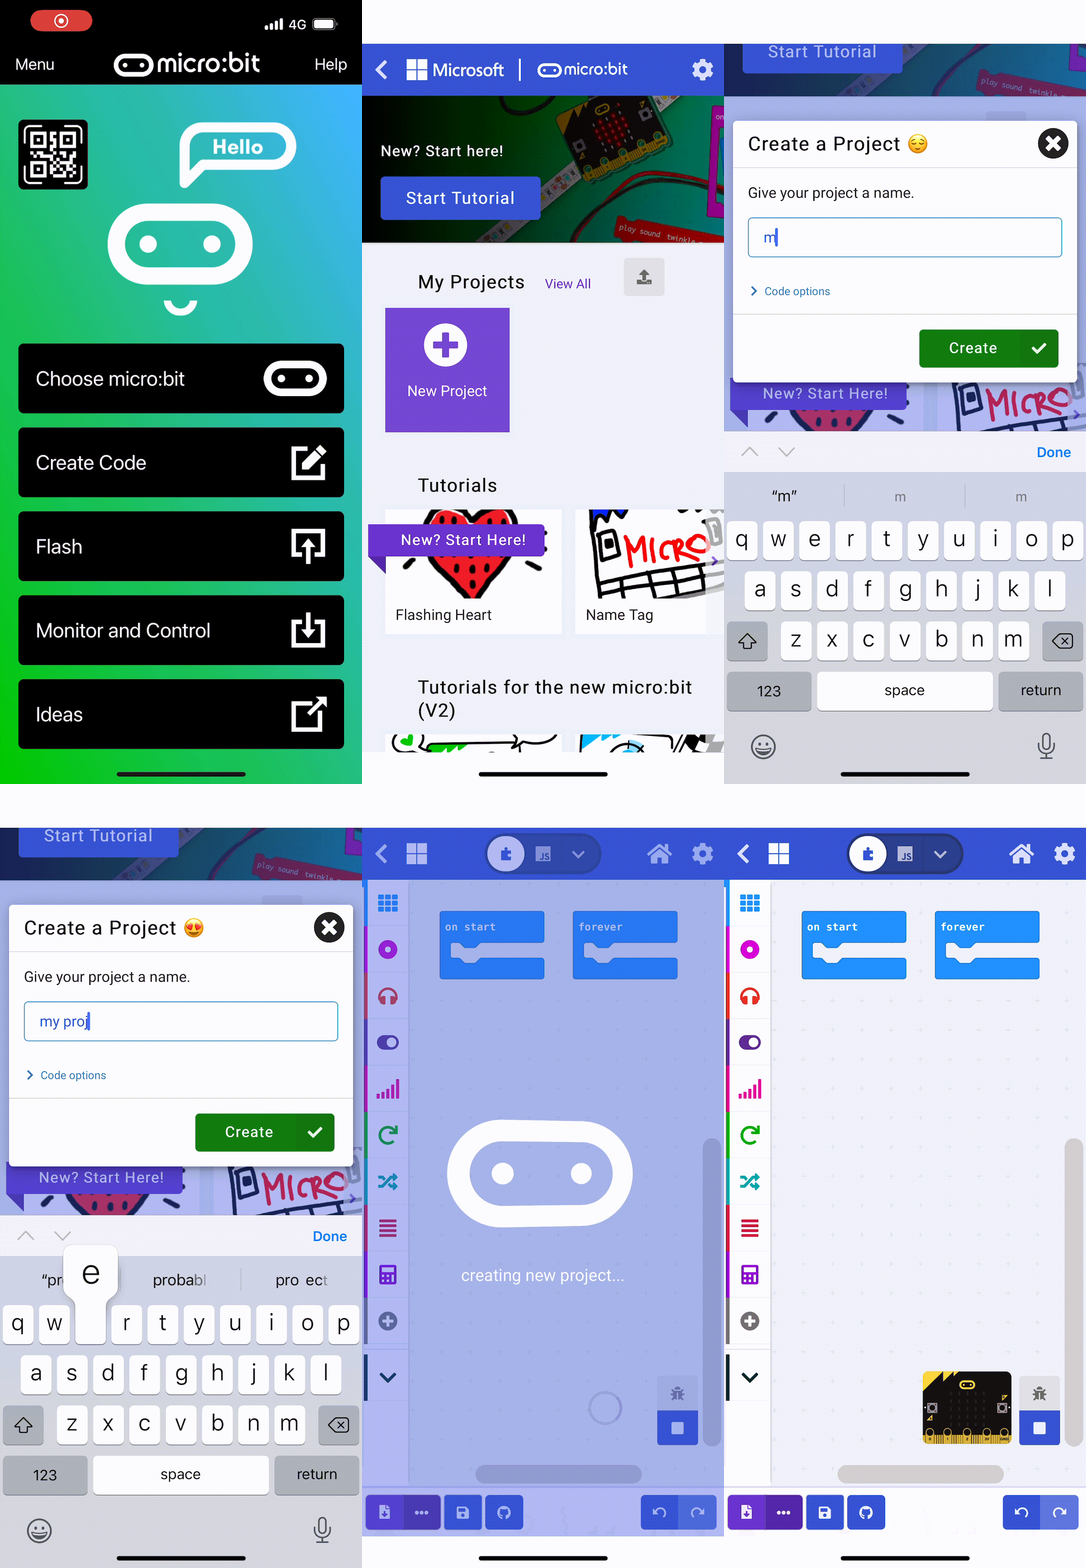
Go to MakeCode for micro:bit and create a new project. Name it 'Traffic Light Reaction Game'.
Go to the Makecode.com Microbit website using the link below and click on the 'New Project' button underneath the 'My Projects' heading.
https://makecode.microbit.org/
Install the micro:bit app on your iPad or tablet.
Open the app, tap 'Create code' and then create a new project.
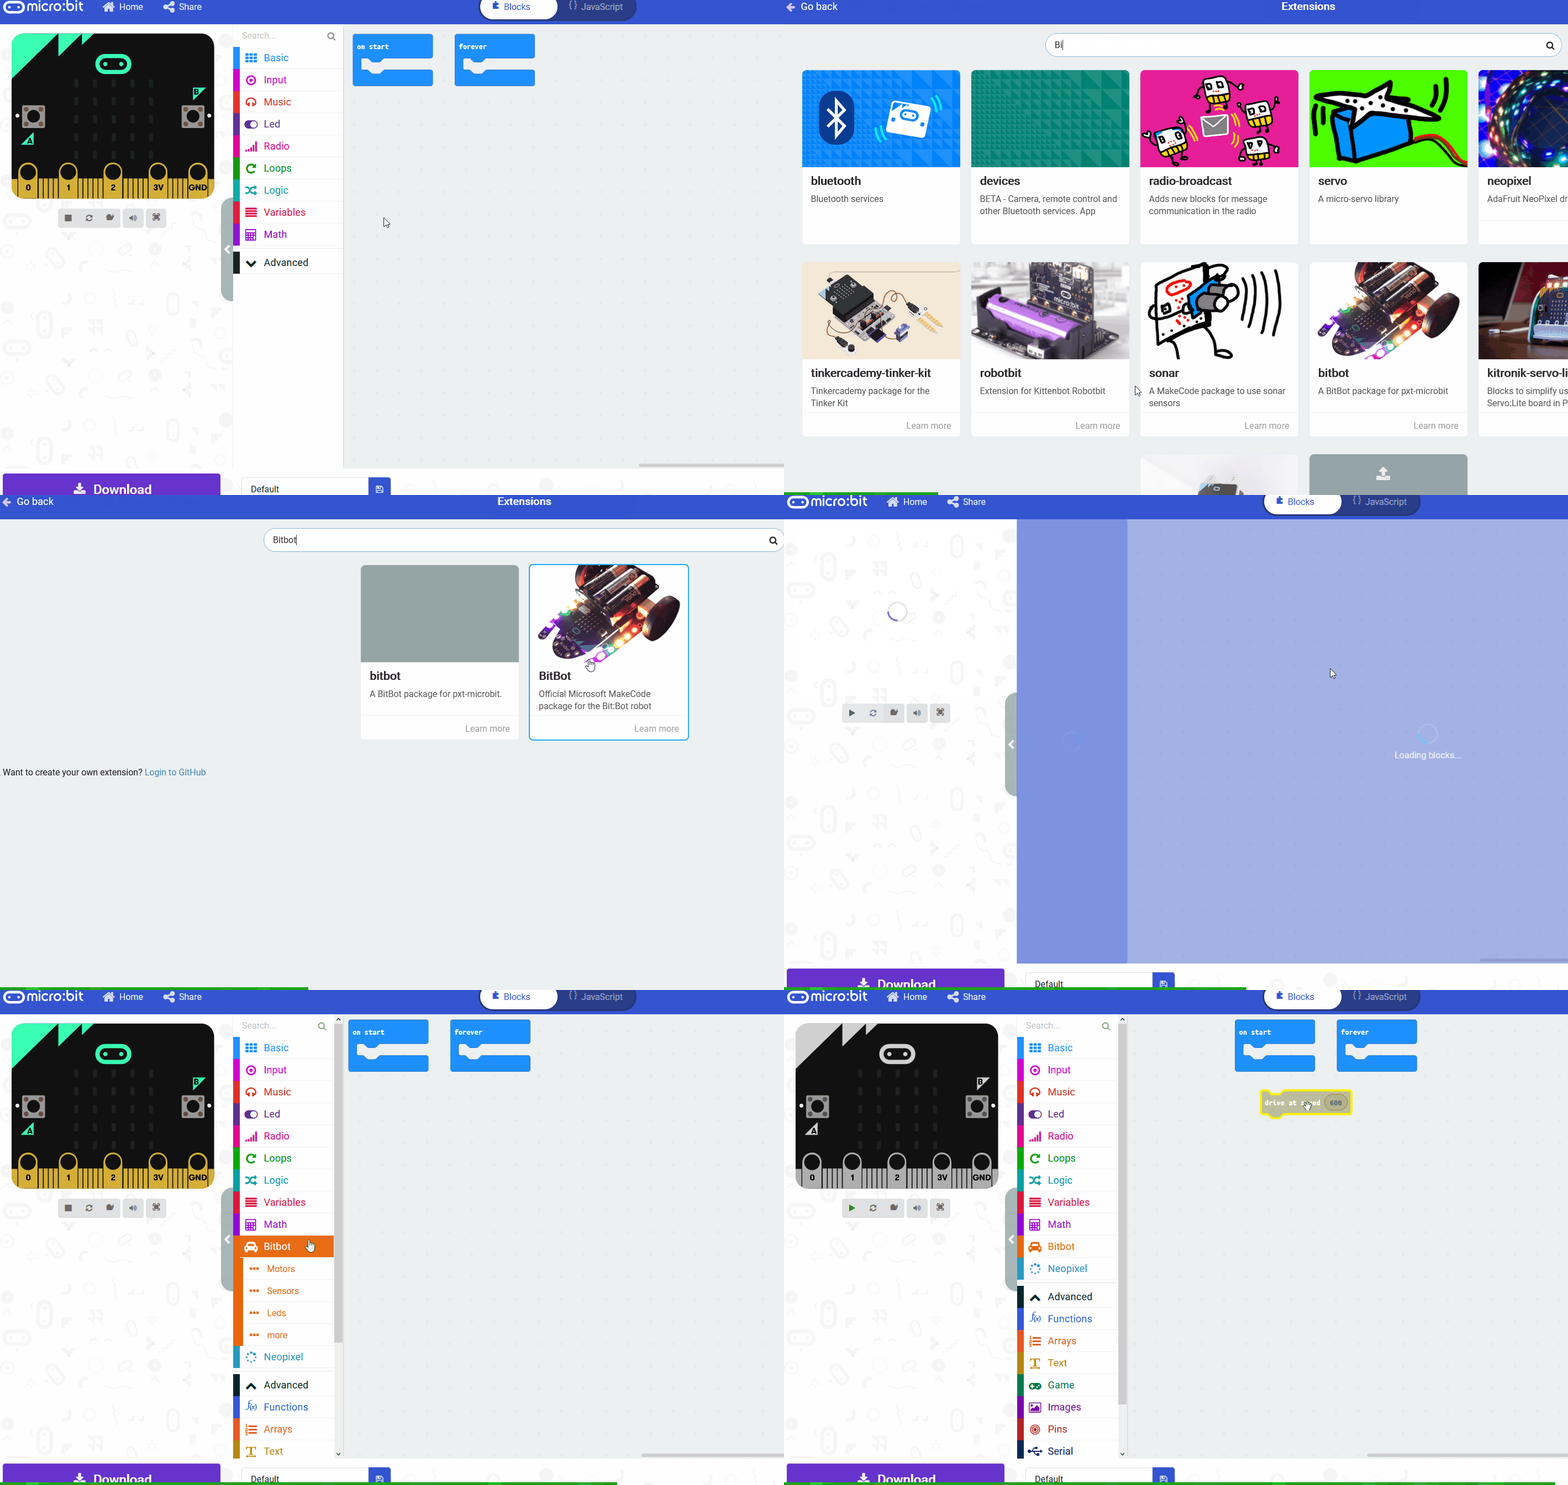
There are custom code blocks that we use to program our traffic lights kit. To add them to our toolbox we need to add the "stopbit" extension.
Search for the "stopbit" extension and then click on the traffic lights kit picture.
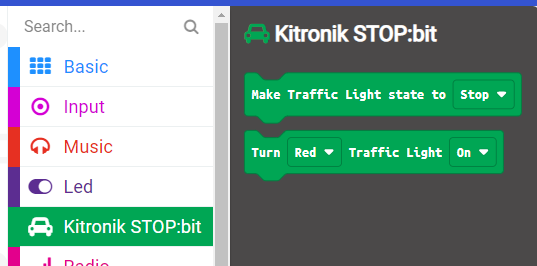
This will add the "Kitronik STOP:bit" category of code blocks to your toolbox.
To add an extension follow these steps:
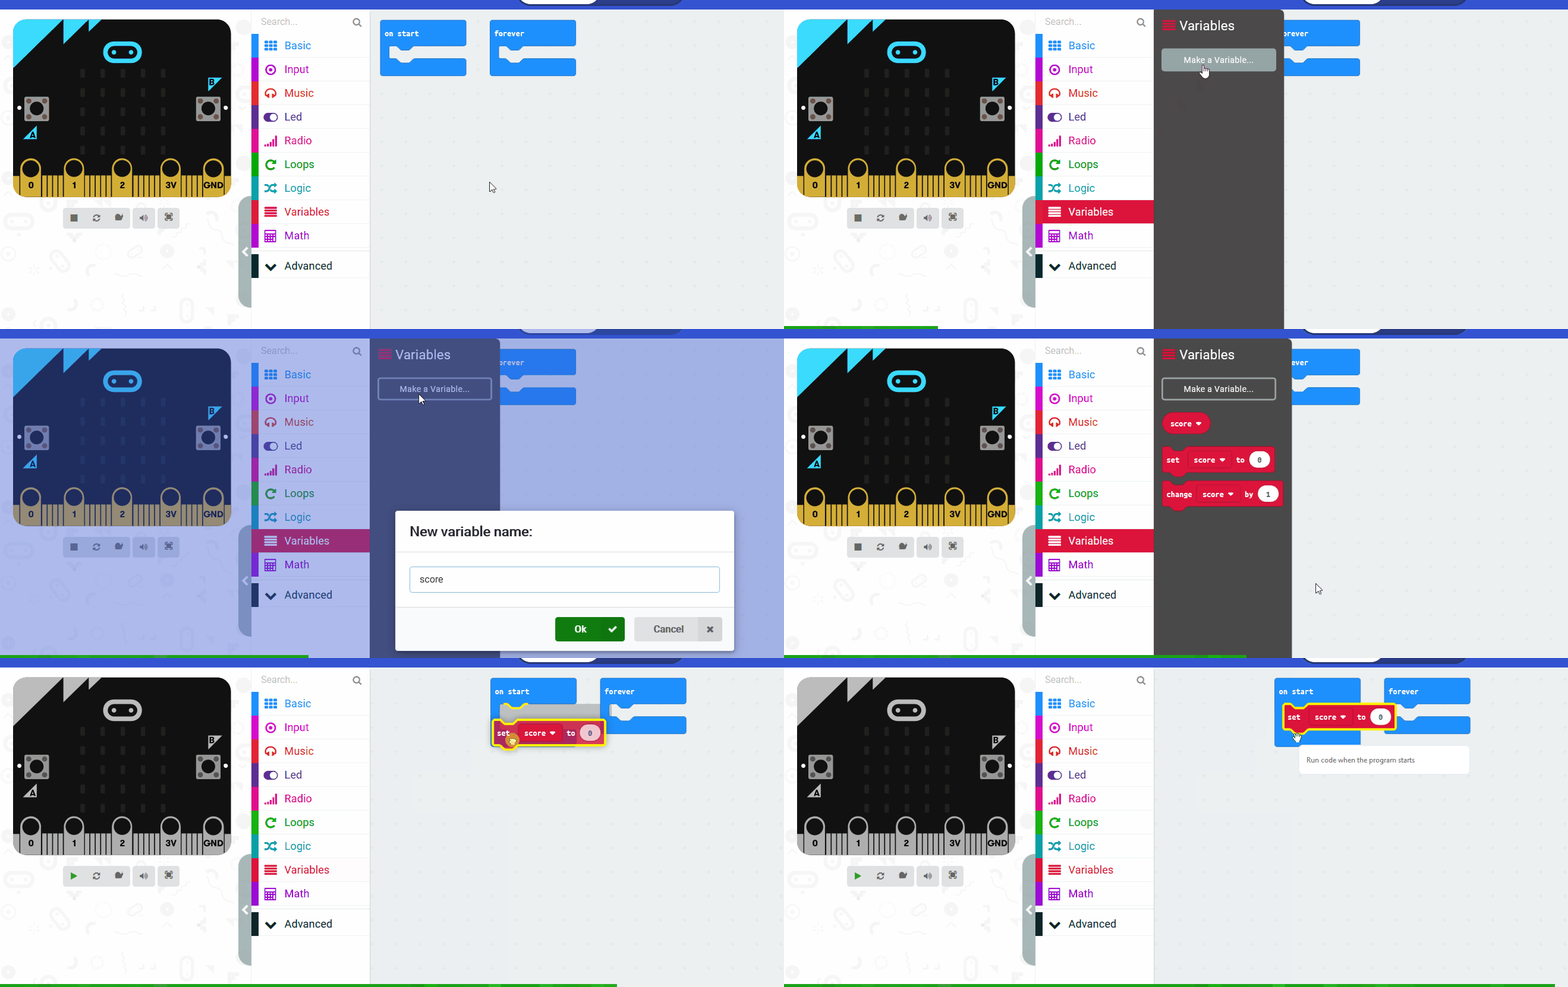
In this step, we will create three variables that will help us measure the reaction time.
In the Variables toolbox, create a new variable by clicking the 'Make a Variable' button.
Once you click this button a box will appear asking what you want to call your variable. Give it a name that reminds you what you will be using it for. For example, if you wanted to keep track of your score in a game, you would create a variable called 'score'.
In this step, we'll set up the code for when button A is pressed. This will turn the traffic light to red, wait for a random amount of time, and then turn it green. We'll also record the start time. Add the following code:
Here's a breakdown of what the code does:
startTime = 0, endTime = 0, and reactionTime = 0 reset the start time, end time, and reaction time variables to 0.Make Traffic Light state to [Stop] turns the traffic light to red (stop).pause(pick random(1, 10) * 1000) waits for a random amount of time between 1 and 10 seconds.Make Traffic Light state to [Go] turns the traffic light to green (go).startTime = runningTime records the start time when the light turns green.In this step, we'll set up the code for when button B is pressed. This will record the end time of your reaction and calculate the reaction time by subtracting the start time from the end time. The reaction time will be the time it took you to press button B after the traffic light turned green.
Add the following code:
input.onButtonPressed(Button.B, function () {
    endTime = input.runningTime()
    reactionTime = endTime - startTime
})
