Computer Science
Beginner
40 mins
Teacher/Student led
What you need:
Chromebook/Laptop/PC

Staged Design

In this lesson, you'll explore a structured approach to software development through distinct phases. Follow step-by-step guidance to understand each stage, from gathering requirements to deployment and maintenance, and reflect on applying this method to a simple project.
Learning Goals Learning Outcomes Teacher Notes

Teacher Class Feed

Load previous activity

    1 - Introduction

    In this lesson, you will explore staged design, also known as the waterfall model, which is a structured approach to software development. You will learn how this linear process works through its distinct phases and consider its advantages and disadvantages.

    By the end of this lesson, you will:

    1. Understand staged design and its key stages, including how it progresses like a waterfall.
    2. Examine requirements gathering to define what software needs to do.
    3. Explore the design phase for planning architecture and interfaces.
    4. Learn about implementation where code is written based on designs.
    5. Discover testing to ensure quality and fix bugs.
    6. Understand deployment for releasing software to users.
    7. Review maintenance for ongoing support and updates.
    8. Reflect on applying the model to a simple project in a hands-on activity.

    This will help you grasp why staged design is useful for projects with clear requirements, while recognising its limitations.

    2 - Understanding Staged Design

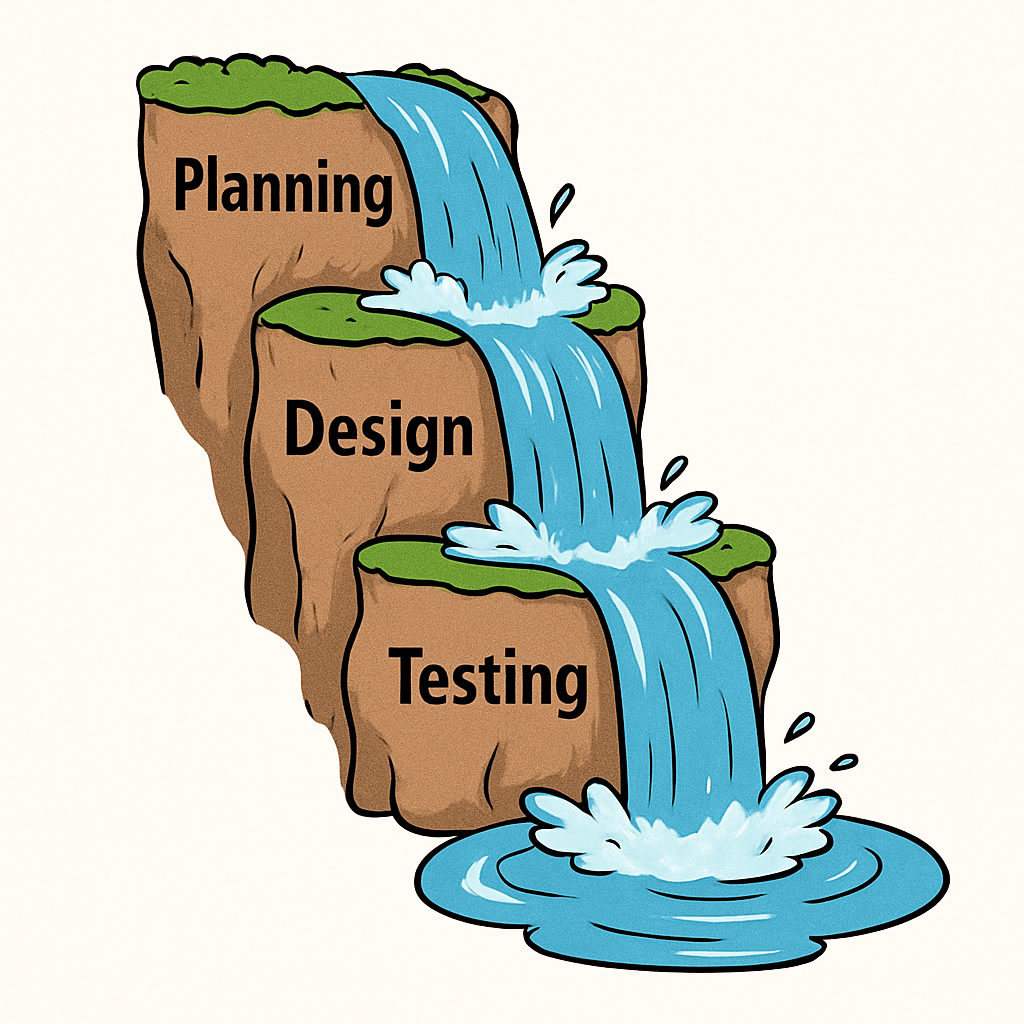
    Staged design, often called the waterfall model, is a linear approach to software development. It progresses through distinct phases one after another, like water flowing down a waterfall, where each phase must be completed before the next begins.

    Key stages include:

    1. Requirements Gathering: Define what the software needs to do by collecting detailed needs from users and stakeholders.
    2. Design: Plan the system's architecture, user interface, and technical specifications in detail.
    3. Implementation: Write the actual code based on the design plans.
    4. Testing: Check for bugs, errors, and ensure the software meets all the defined requirements.
    5. Deployment: Release the software to users, making it available for real-world use.
    6. Maintenance: Fix any issues that arise after release and provide ongoing support.

    In this model, you complete each stage fully before moving to the next. It's structured and easy to manage for projects with clear, unchanging requirements, such as those with strict regulations or fixed scopes.

    Advantages:

    • Clear milestones that help in planning and budgeting
    • Easy to track progress through defined phases
    • Good for documentation, as each stage produces detailed records

    Disadvantages:

    • Inflexible to changes; adapting to new requirements mid-project is challenging
    • If a problem is found late in the process, it can be costly and time-consuming to fix, potentially requiring rework of earlier stages
    Think of it like building a house: you plan everything first, create blueprints, then build step by step without going back to change the foundation once construction starts.

    3 - Requirements Gathering

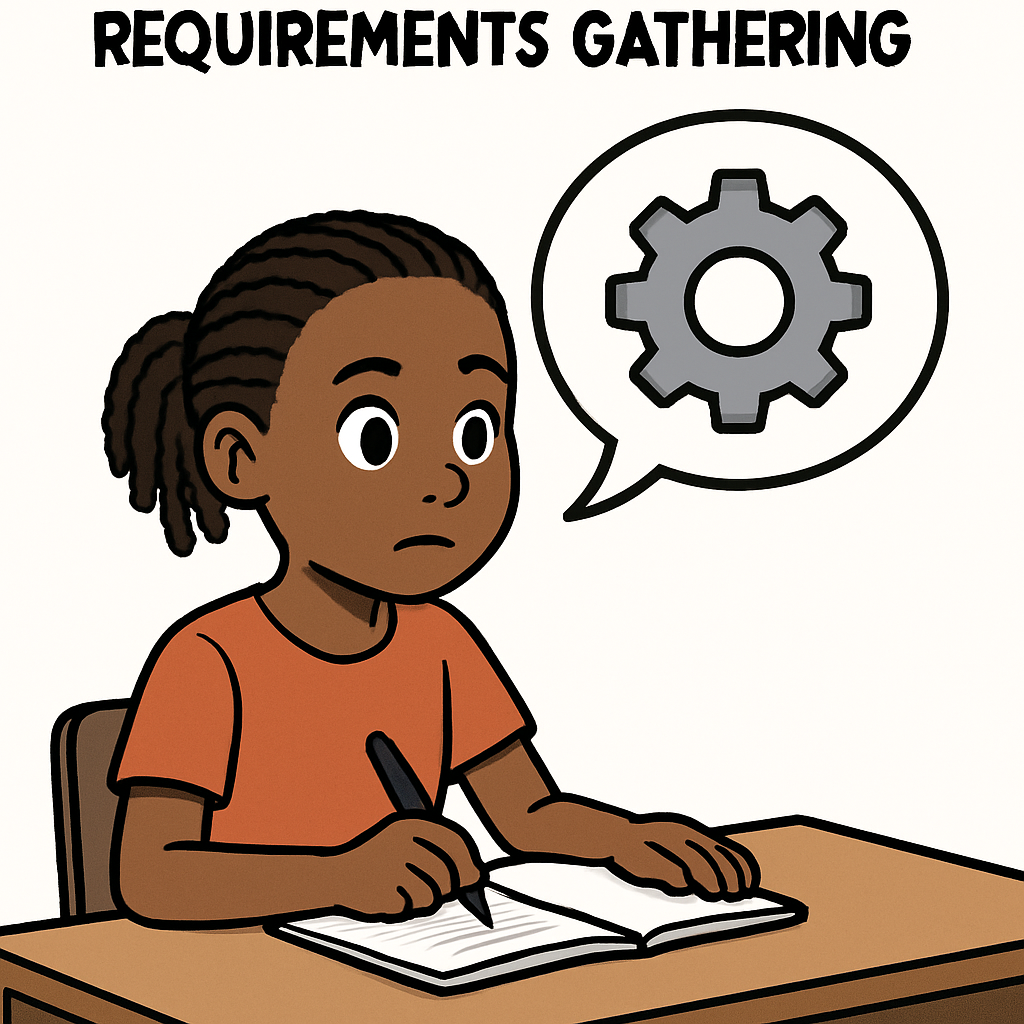
    In the staged design process, requirements gathering is the crucial first stage. This is where you define exactly what the software needs to do, who it is for, and what problems it will solve. It's like laying the foundation for a building – get this wrong, and everything else could collapse.

    Key activities in requirements gathering include:

    • Identifying stakeholders: These are the people who will use or be affected by the software, such as users, clients, or managers. Talk to them to understand their needs.
    • Collecting requirements: Use interviews, surveys, or questionnaires to gather details. Requirements can be functional (what the software must do, e.g., 'allow users to log in') or non-functional (how it performs, e.g., 'load in under 2 seconds').
    • Documenting everything: Create a clear requirements specification document. This acts as a blueprint for the rest of the project.
    • Analysing feasibility: Check if the requirements are realistic given time, budget, and technology constraints.

    This stage is completed fully before moving on, ensuring everyone agrees on the goals upfront. However, if requirements change later, it can be hard to go back.

    Example: If you're building a school app for tracking homework, you'd gather requirements like 'students can submit assignments' and 'teachers can grade them' by talking to students and teachers.
    Remember, thorough requirements gathering reduces surprises later. 

    4 - Design

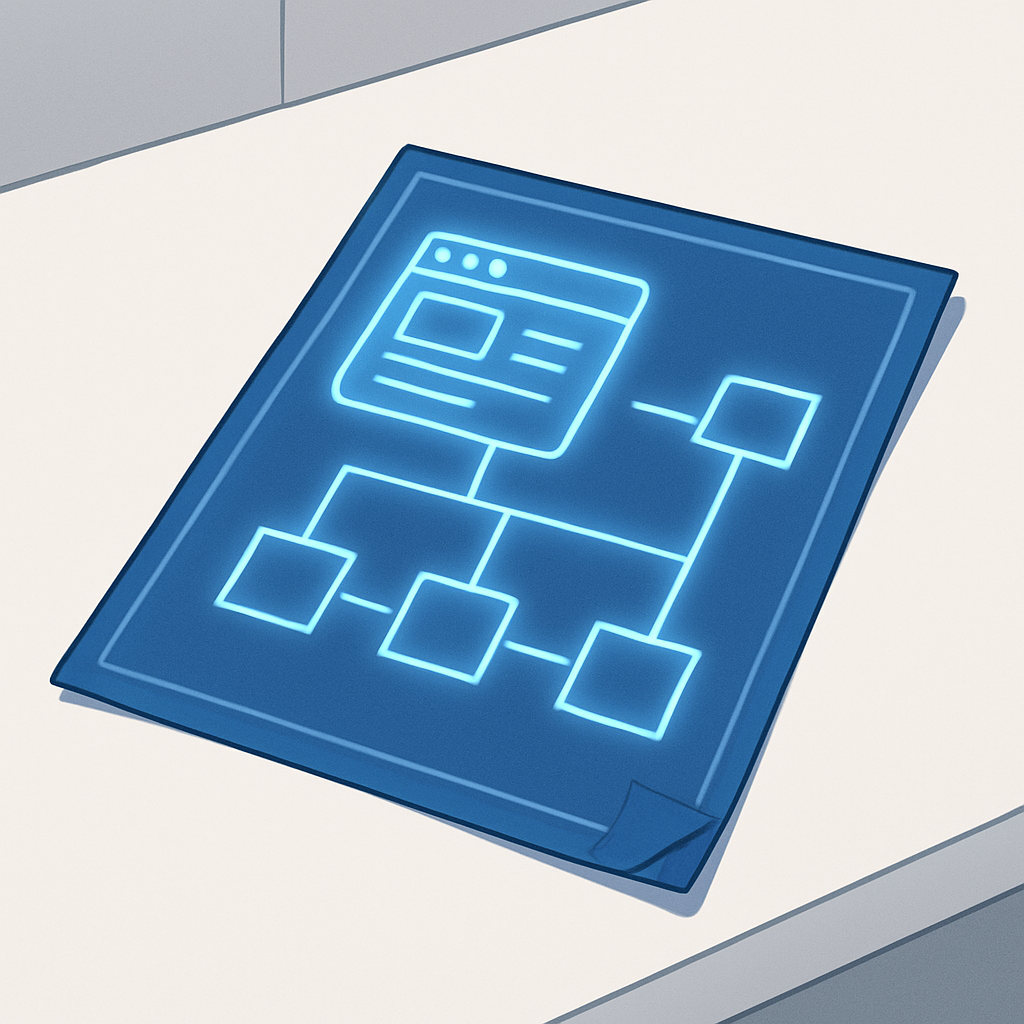
    In the staged design process, the design phase follows requirements gathering. This is where you translate the collected requirements into a detailed blueprint for the software. You plan the system's architecture, user interface, database structure, and technical specifications, ensuring everything aligns with the defined needs.

    Key activities in the design phase include:

    • System architecture design: Outline the overall structure, including how different components will interact (e.g., front-end, back-end, and databases).
    • User interface (UI) and user experience (UX) design: Create wireframes, mockups, and prototypes to show how the software will look and feel to users.
    • Technical specifications: Detail the technologies, algorithms, and data flows needed, such as choosing programming languages or defining security measures.
    • Documenting designs: Produce diagrams, flowcharts, and specifications that guide the implementation phase.

    This phase is completed before coding begins, providing a clear roadmap. However, if changes are needed later, it may require revisiting earlier work.

    Example: For the school homework app, you'd design the login screen layout, database tables for assignments, and how data flows from student submissions to teacher grading.
    Remember, a solid design prevents major issues during implementation. 

    5 - Implementation

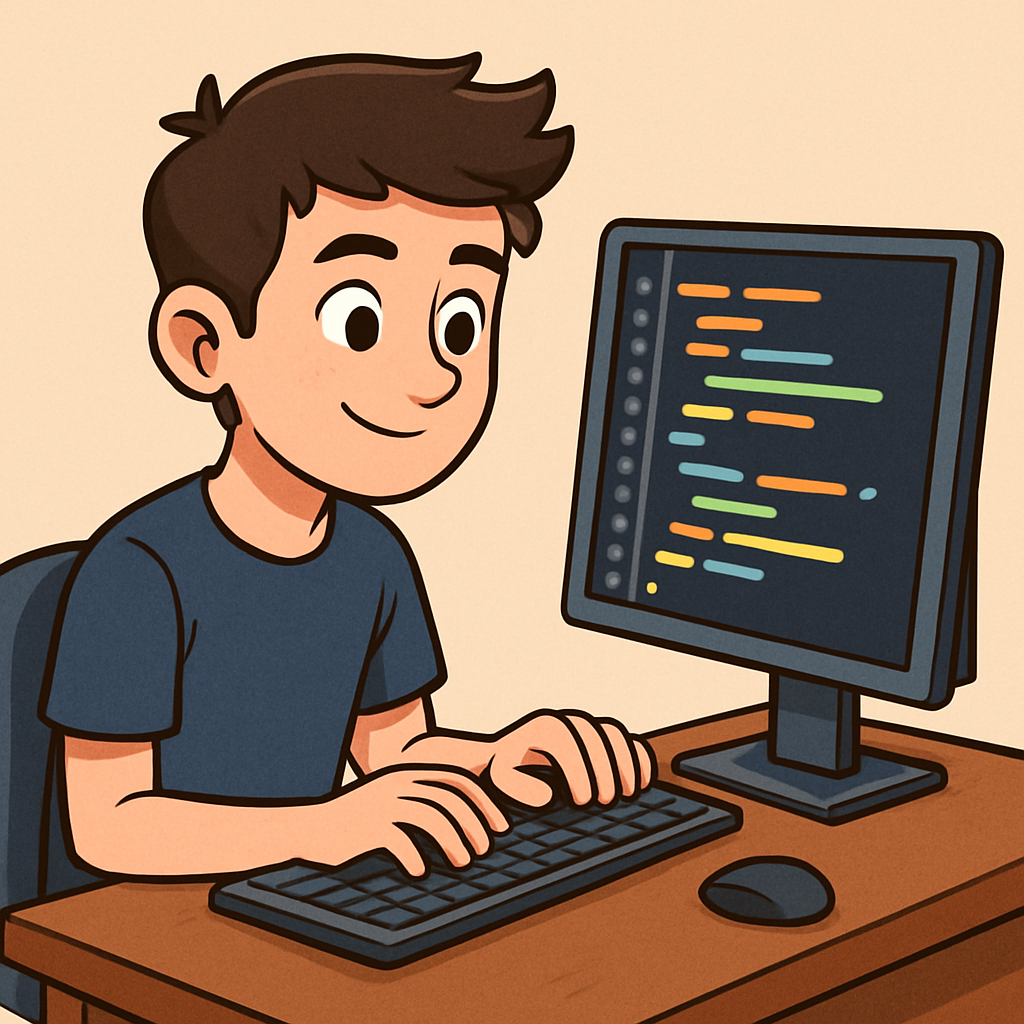
    In the staged design process, the implementation phase follows the design phase. This is where you actually build the software by writing code based on the detailed designs created earlier. Developers translate the blueprints into a working product, focusing on coding, integrating components, and ensuring everything functions as planned.

    Key activities in the implementation phase include:

    • Coding: Write the source code for each module or component using the chosen programming languages and tools.
    • Integration: Combine different parts of the software, such as connecting the user interface to the backend and database.
    • Following specifications: Adhere strictly to the design documents to ensure consistency.
    • Version control: Use tools like Git to manage code changes and collaborate if working in a team.

    This phase is completed before testing begins, resulting in a fully coded application ready for verification. However, if issues are found later, it might require revisiting earlier phases, which can be costly.

    Example: For the school homework app, you'd code the login functionality, implement the assignment submission forms, and set up the database connections as per the design.
    Remember, implementation turns plans into reality, but accuracy here is key to avoid rework.

    Unlock the Full Learning Experience

    Get ready to embark on an incredible learning journey! Get access to this lesson and hundreds more in our Digital Skills Curriculum.

    Copyright Notice
    This lesson is copyright of DigitalSkills.org 2017 - 2025. Unauthorised use, copying or distribution is not allowed.
    🍪 Our website uses cookies to make your browsing experience better. By using our website you agree to our use of cookies. Learn more