Computer Science Databases
Beginner
80 mins
Teacher/Student led
What you need:
Chromebook/Laptop/PC

Running SQL Queries

In this lesson, you'll learn to run SQL queries in Visual Studio Code using the SQLite Explorer extension. Follow step-by-step instructions to set up, create and modify tables, manage records, and perform joins with the 'users.db' database.
Learning Goals Learning Outcomes Teacher Notes

Live Class Feed

This is a live feed of the latest activity by your students on this lesson. It will update in real-time as they work on the lesson.
Load previous activity

    1 - Introduction

    In this lesson, you'll learn how to run SQL queries directly in Visual Studio Code using the SQLite Explorer extension. You'll work with the 'users.db' database from the previous lesson, which should have 'users' and 'hobbies' tables. If you don't have it, you can recreate it quickly.

    By the end, you'll be proficient at creating, modifying, and deleting tables and records, selecting data, and performing simple joins. This hands-on practice will help you understand database management without needing a full web app.

    Here's what you'll do:

    1. Set up SQLite Explorer in VS Code.
    2. Create and modify tables.
    3. Insert, update, delete, and select records.
    4. Perform simple joins.

    2 - Open your FlaskSQLiteIntro Project

    To get started, you need to open your existing project in Visual Studio Code and access the database.

    1. Launch Visual Studio Code on your computer.
    2. Go to the File menu and select 'Open Folder'. Navigate to the folder where you saved your FlaskSQLiteIntro project from the previous lesson and open it.

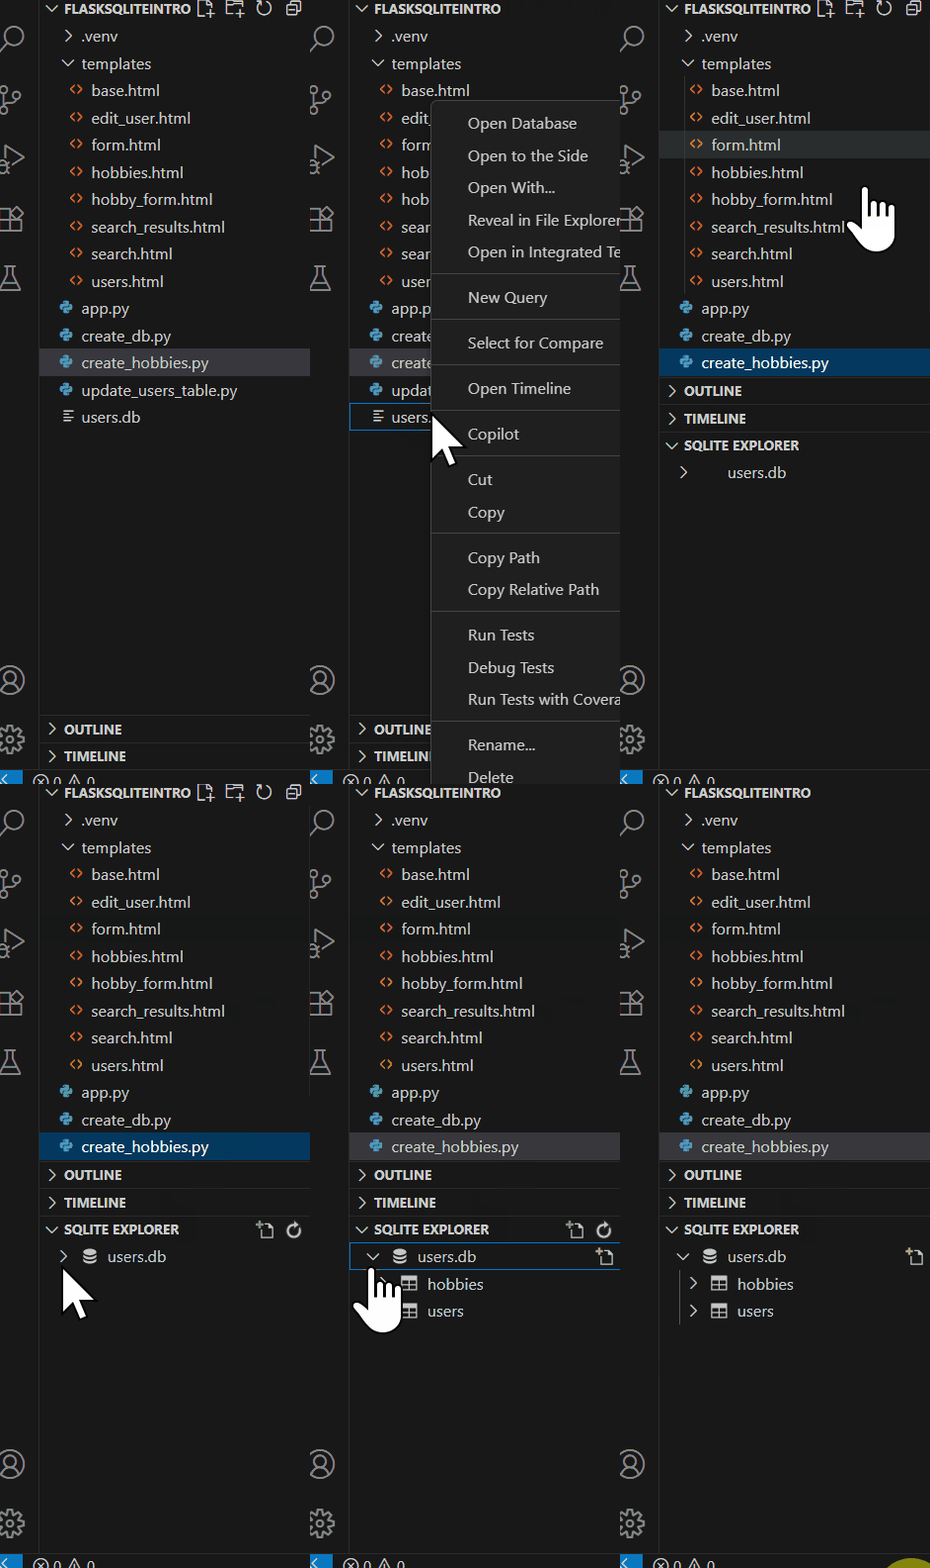
    Open the users.db database by:

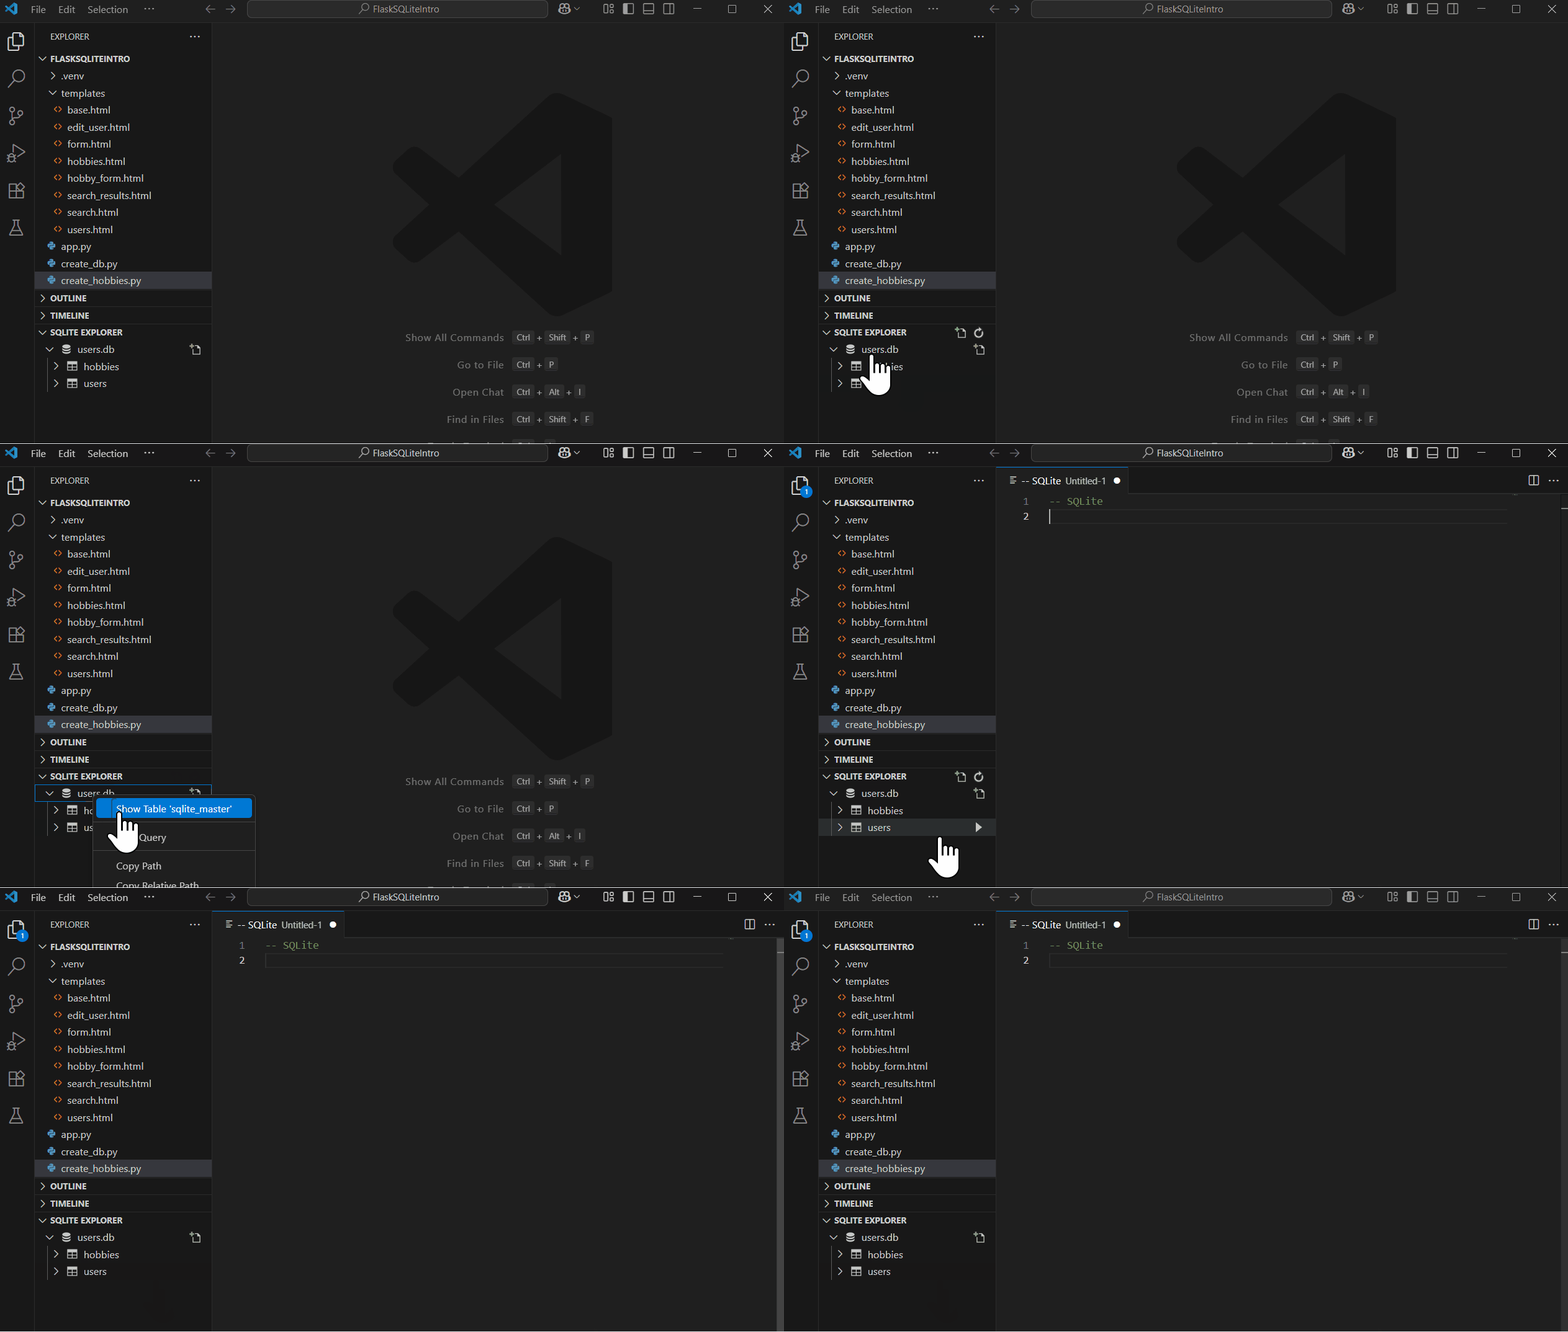
    1. In the Explorer pane on the left side of VS Code, locate the users.db file in your project folder.
    2. Right-click on the users.db file.
    3. Select 'Open Database' from the context menu. This will open the database in the SQLite Explorer panel.
    This will allow you to view and work with this database from the previous lessons.

    3 - Create a New Query

    To create a new query in Visual Studio Code using the SQLite Explorer extension, follow these steps:

    1. Right-click on your database name in the SQLite Explorer panel.
    2. Select 'New Query' from the context menu. This will open a new tab in the editor where you can write your SQL commands.
    This allows you to execute SQL directly on your database without needing to set up a separate environment.

    4 - Creating a Table

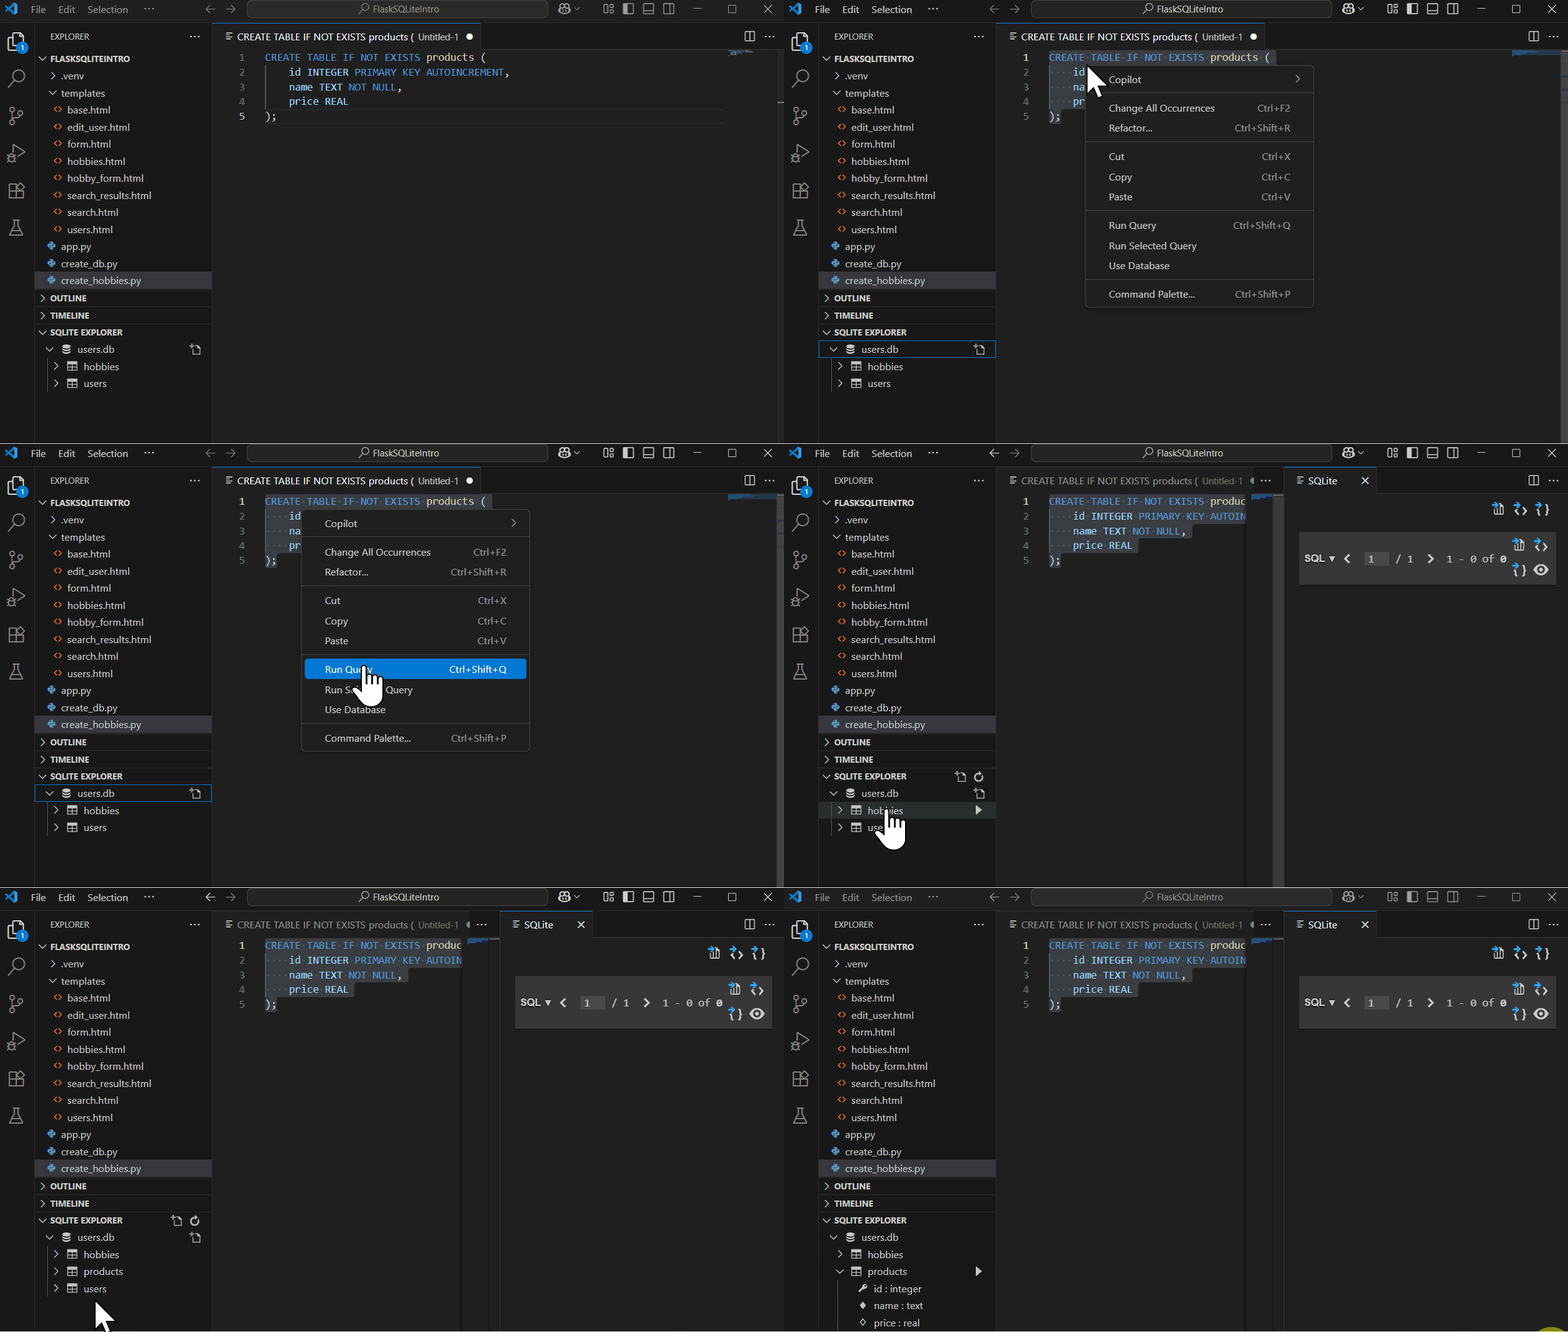
    Let's create a new table to practise. In the SQL editor tab, type this SQL command:

    CREATE TABLE IF NOT EXISTS products (
        id INTEGER PRIMARY KEY AUTOINCREMENT,
        name TEXT NOT NULL,
        price REAL
    );

    Highlight the query and run it by right-clicking and selecting 'Run Query' or using the extension's run button.

    Refresh the SQLite Explorer panel. You should see the 'products' table listed.

    This creates a table with an auto-incrementing ID, a name (text), and a price (real number).


    5 - Modifying a Table

    To modify a table, use ALTER TABLE. Let's add a column to the 'products' table.

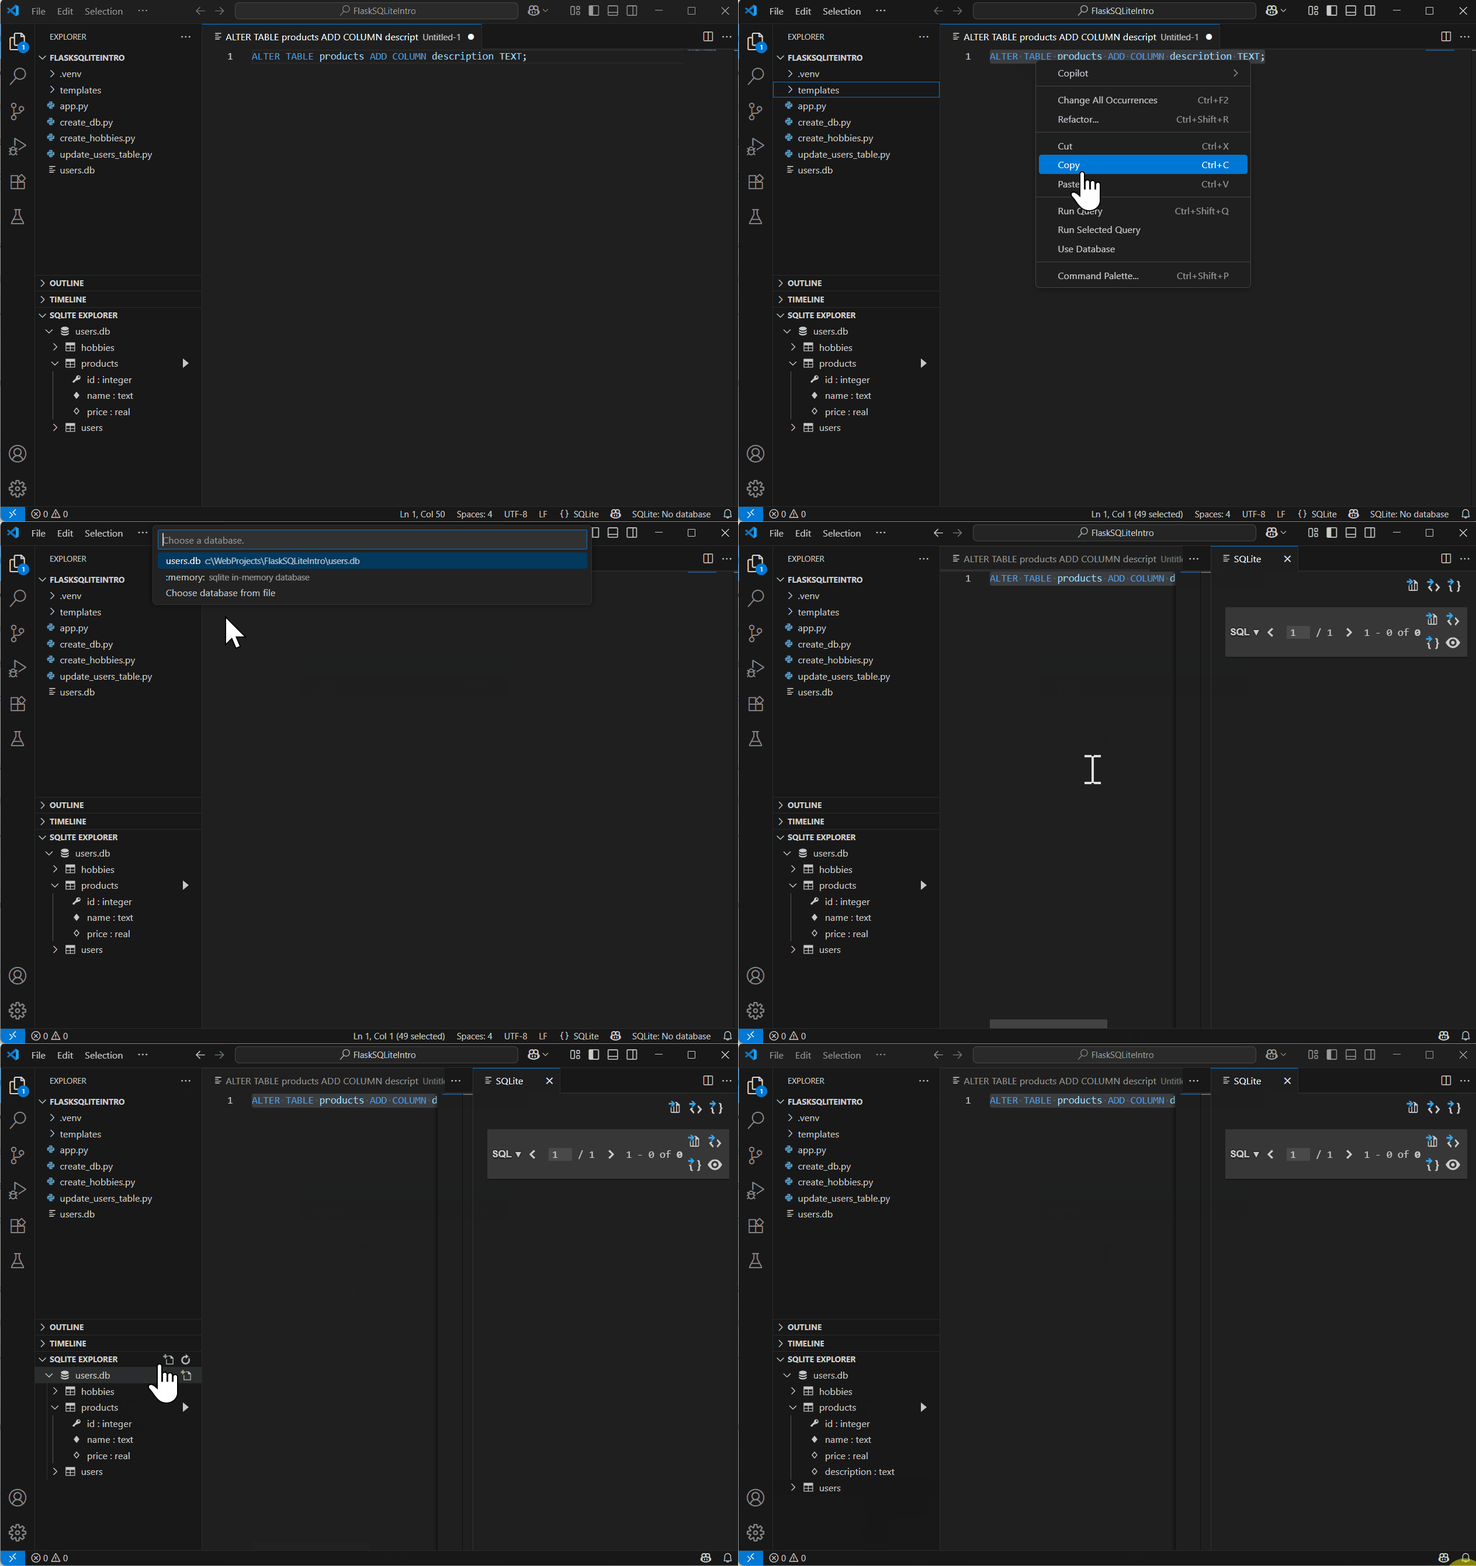
    In a new query tab, enter:

    ALTER TABLE products ADD COLUMN description TEXT;

    Run the query (you may need to select what database to run it against). Now, the table has a new 'description' column.

    Check the table structure in SQLite Explorer by expanding the table to see columns.

    Modifying tables helps adapt your database as needs change.

    Unlock the Full Learning Experience

    Get ready to embark on an incredible learning journey! Get access to this lesson and hundreds more in our Digital Skills Curriculum.

    Copyright Notice
    This lesson is copyright of DigitalSkills.org. Unauthorised use, copying or distribution is not allowed.
    🍪 Our website uses cookies to make your browsing experience better. By using our website you agree to our use of cookies. Learn more