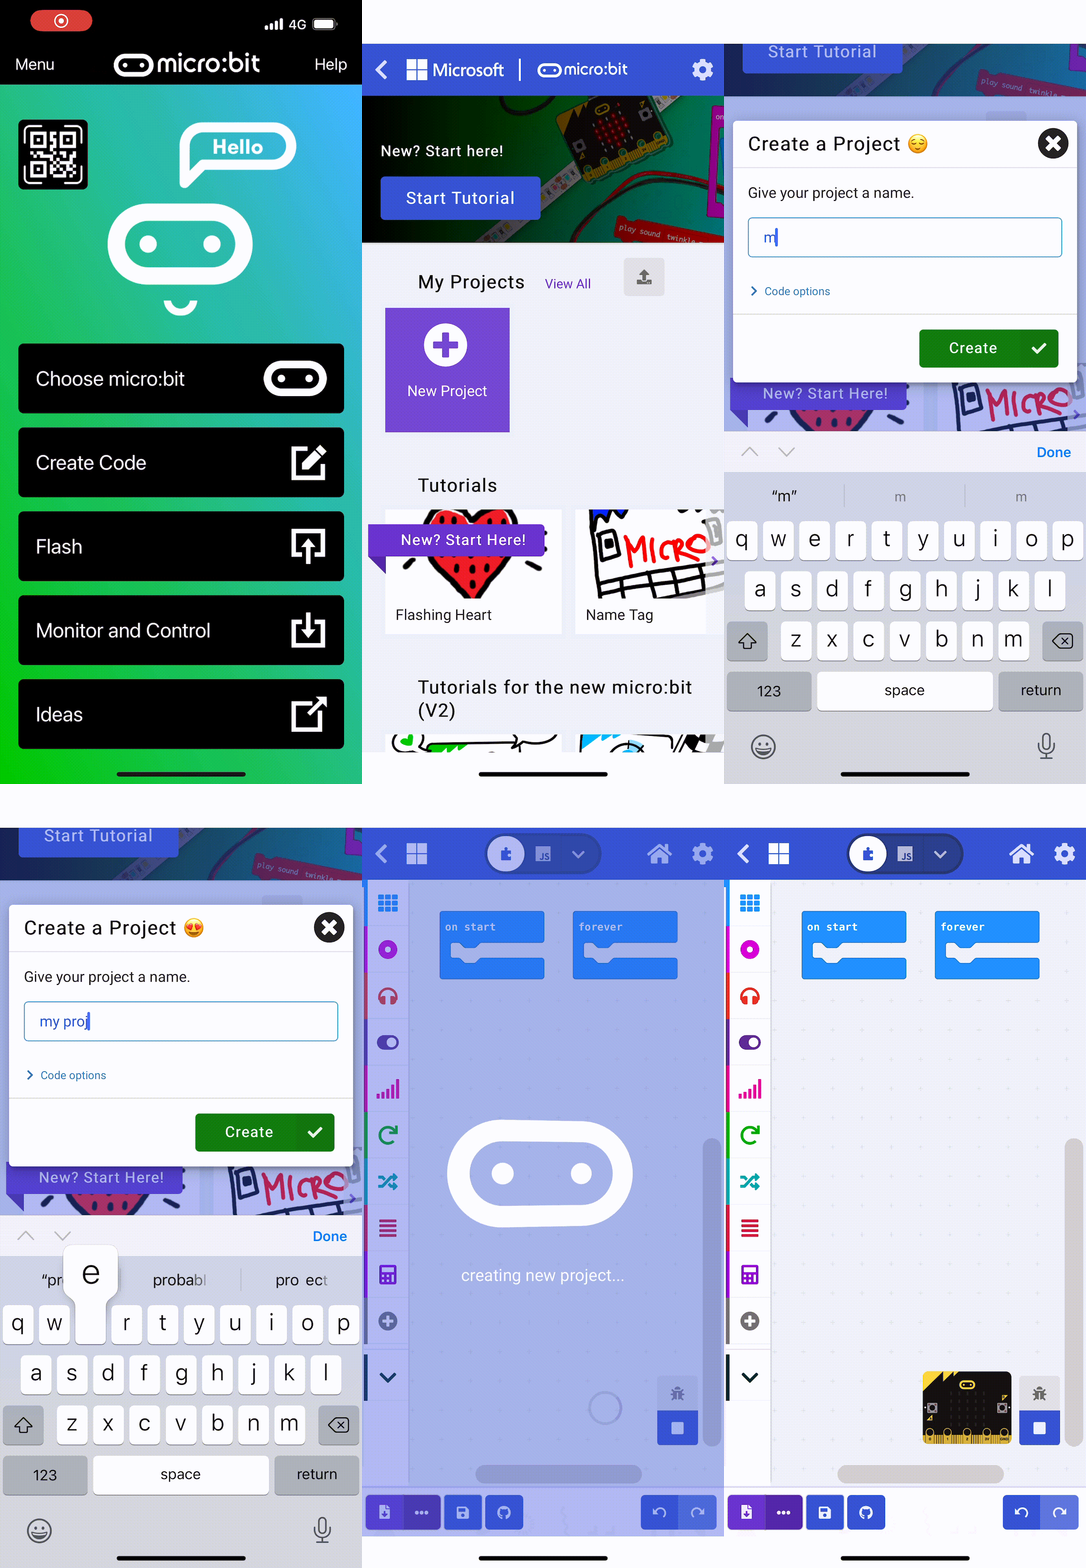
First, go to the Micro:bit website. Click on 'New Project' and name your project as 'Reaction Timer'.
Go to the Makecode.com Microbit website using the link below and click on the 'New Project' button underneath the 'My Projects' heading.
https://makecode.microbit.org/
Install the micro:bit app on your iPad or tablet.
Open the app, tap 'Create code' and then create a new project.

Let's start by creating a welcome message that will be displayed when you power on your Microbit.
Add the following code to your project:
basic.showString("Get Ready")
After the welcome message, we are going to create a countdown from 3 to 1 and then show a line on the screen.
Add the following new code to your project:
basic.showString("Get Ready")
basic.showNumber(3)
basic.pause(1000)
basic.showNumber(2)
basic.pause(1000)
basic.showNumber(1)
basic.pause(1000)
basic.showLeds(`
    . . . . .
    . . . . .
    # # # # #
    . . . . .
    . . . . .
    `)
To make the game unpredictable, let's add a random delay after the countdown.
Add the following new code to create a random delay between 1 to 5 seconds (1,000 to 5,000 milliseconds) and then show the signal (a fully lit up LED screen) to the player.
basic.showString("Get Ready")
basic.showNumber(3)
basic.pause(1000)
basic.showNumber(2)
basic.pause(1000)
basic.showNumber(1)
basic.pause(1000)
basic.showLeds(`
    . . . . .
    . . . . .
    # # # # #
    . . . . .
    . . . . .
    `)
basic.pause(Math.randomRange(1000, 5000))
basic.showLeds(`
    # # # # #
    # # # # #
    # # # # #
    # # # # #
    # # # # #
    `)
We will need 2 variables to store some time stamps:
Create these variables now and then add the following new code to set the startTime variable.
let startTime = 0
basic.showString("Get Ready")
basic.showNumber(3)
basic.pause(1000)
basic.showNumber(2)
basic.pause(1000)
basic.showNumber(1)
basic.pause(1000)
basic.showLeds(`
    . . . . .
    . . . . .
    # # # # #
    . . . . .
    . . . . .
    `)
basic.pause(randint(1000, 5000))
basic.showLeds(`
    # # # # #
    # # # # #
    # # # # #
    # # # # #
    # # # # #
    `)
startTime = input.runningTime()
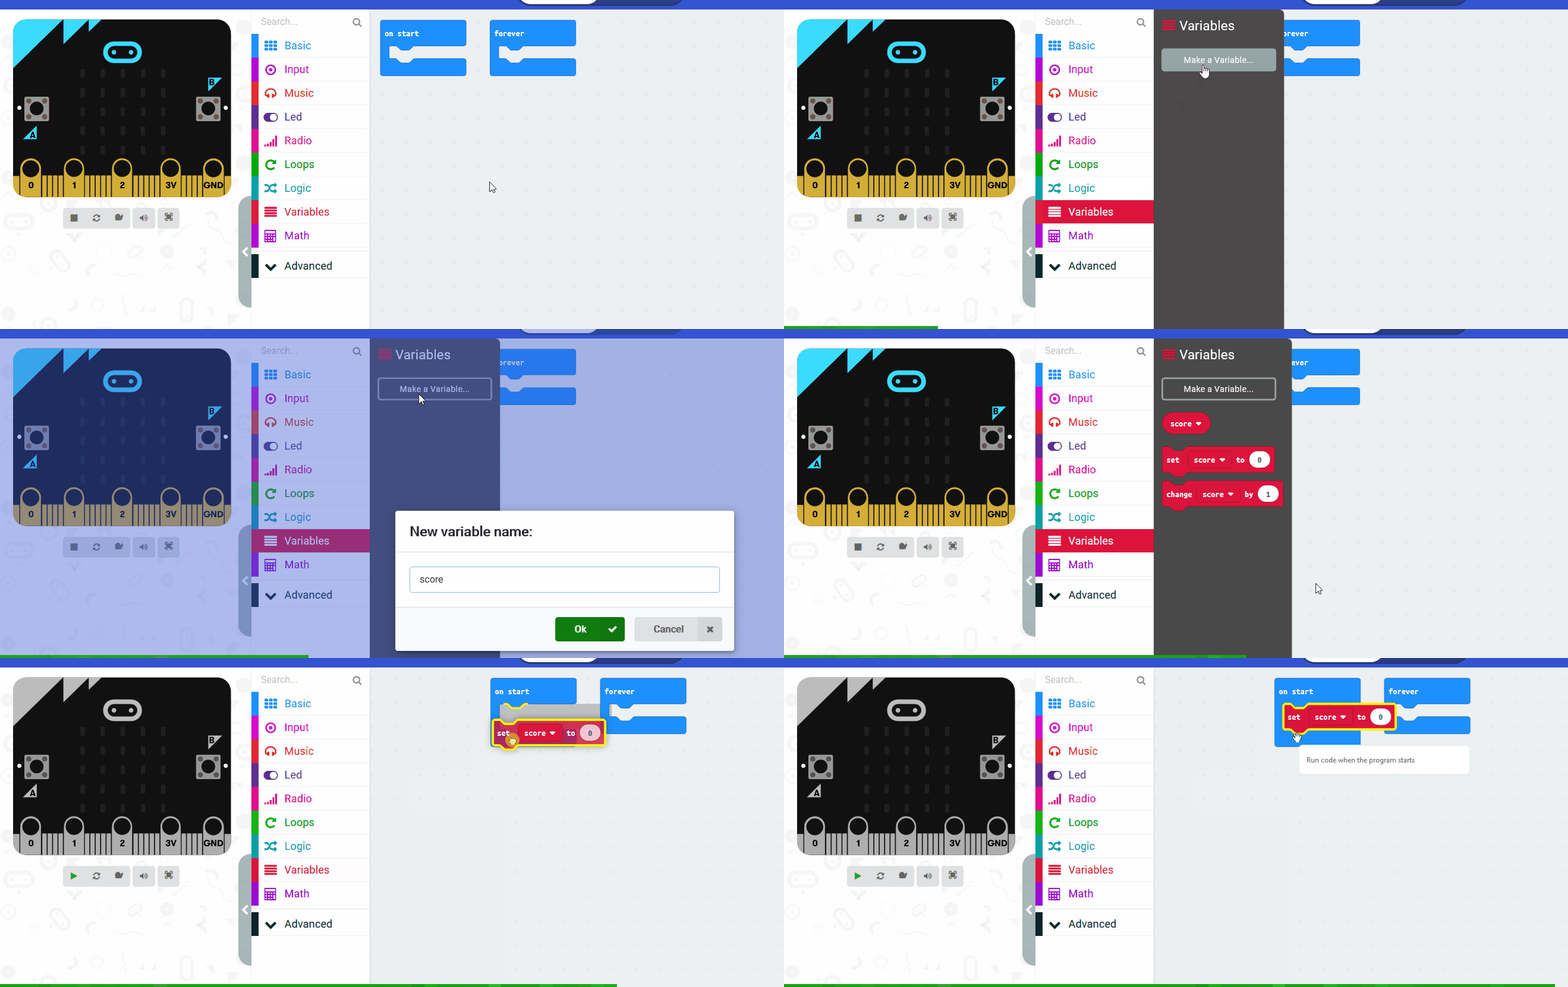
running time (ms) block stores the number of milliseconds since the program started.In the Variables toolbox, create a new variable by clicking the 'Make a Variable' button.
Once you click this button a box will appear asking what you want to call your variable. Give it a name that reminds you what you will be using it for. For example, if you wanted to keep track of your score in a game, you would create a variable called 'score'.

