In this project, you will be programming four separate Microbits. Each Microbit will have a unique role in our Seismic and Meteorological Station:
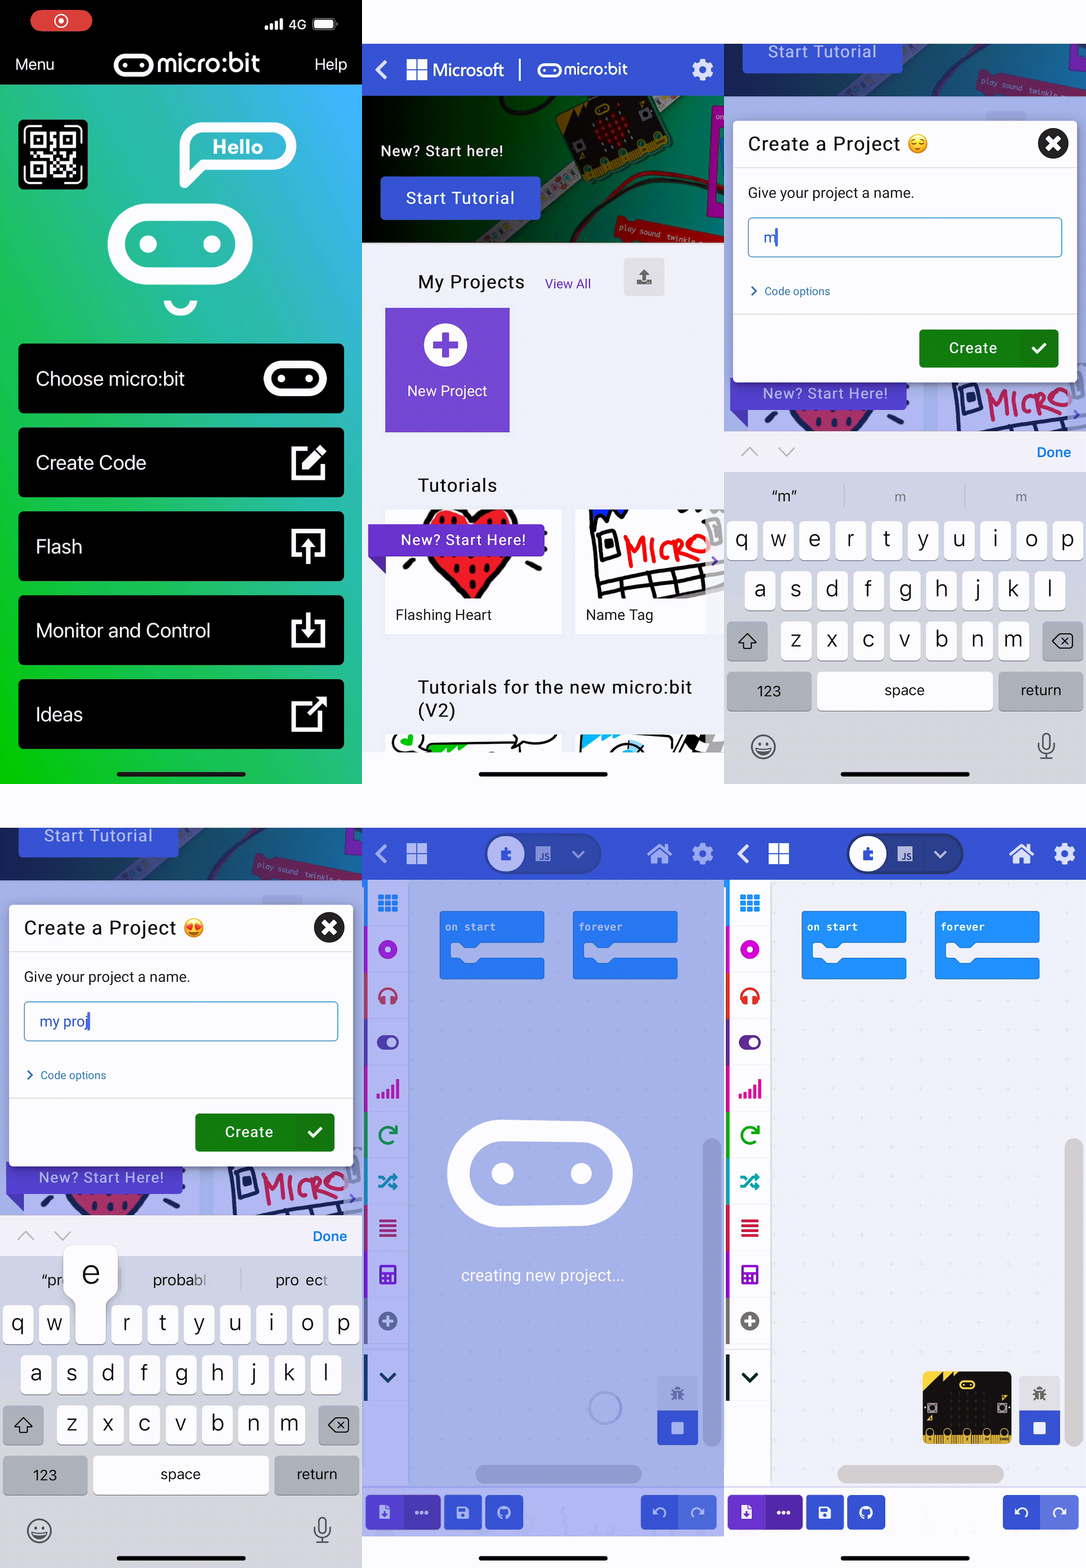
Now, let's start by creating the first project on MakeCode for Microbit. Go to https://makecode.microbit.org/ and click on 'New Project' and name the project 'Seismic Station'.
Go to the Makecode.com Microbit website using the link below and click on the 'New Project' button underneath the 'My Projects' heading.
https://makecode.microbit.org/
Install the micro:bit app on your iPad or tablet.
Open the app, tap 'Create code' and then create a new project.

Let's start with the 'Seismic and Meteorological Station' Microbit. This Microbit will gather and broadcast the sensor data. It will monitor temperature, light levels, and 'seismic' activity (which we simulate by shaking the Microbit).
Add the following code:
radio.setGroup(1)

basic.forever(function () {
    radio.sendValue("temperature", input.temperature())
    radio.sendValue("lightlevel", input.lightLevel())
})

input.onGesture(Gesture.Shake, function () {
	radio.sendValue("seismicactivity", 1)
})
In the code above, we're setting up the radio communication in group 1. We're also setting up an event handler for the 'shake' gesture to send a 'seismicactivity' message. In the forever loop, the Microbit constantly sends the temperature and light level values.
Once you have added the code, download it onto the Microbit that will act as the 'Seismic and Meteorological Station'.
Next create a new Microbit project and call it something like 'Temperature Display'. This will be the project for the 'Temperature Display' Microbit. This Microbit will listen for the 'temperature' radio messages and display the received value on its LED matrix.
Add the following code:
{radio.setGroup(1)
radio.onReceivedValue(function (name, value) {
    if (name == "temperature") {
        basic.showNumber(value)
    }
})}
In the code above, we're setting up the radio communication in group 1 and listening for 'temperature' messages. When such a message is received, the Microbit displays the temperature value.
Once you have added the code, download it onto the Microbit that will act as the 'Temperature Display'.
Now let's create a new Microbit project and call it something like 'Day Night Indicator'. This Microbit will listen for the 'lightlevel' radio messages and display a sun for high light levels (day) and a moon for low light levels (night).
Add the following code:
{radio.setGroup(1)
radio.onReceivedValue(function (name, value) {
    if (name == "lightlevel") {
        if (value > 128) {
            basic.showIcon(IconNames.SmallDiamond)
        } else {
            basic.showIcon(IconNames.SmallSquare)
        }
    }
})}
In the code above, we're setting up the radio communication in group 1 and listening for 'lightlevel' messages. When such a message is received, the Microbit checks if the light level is above 128 (this threshold is arbitrary and can be adjusted). If the light level is high, it displays a sun; if it's low, it displays a moon.
Once you have added the code, download it onto the Microbit that will act as the 'Day/Night Indicator'.
Finally, let's code the 'Seismic Alert' Microbit, create a new project and call it something like 'Seismic Alert'. This Microbit will listen for the 'seismicactivity' radio messages and display and sound a warning if the station detects seismic activity.
Add the following code:
radio.onReceivedValue(function (name, value) {
    if (name == "seismicactivity") {
        if (value == 1) {
            basic.showIcon(IconNames.Chessboard)
            music.ringTone(262)
        } else {
            basic.clearScreen()
            music.stopAllSounds()
        }
    }
})
radio.setGroup(1)
In the code above, we're setting up the radio communication in group 1 and listening for 'seismicactivity' messages. When such a message is received, the Microbit checks if the value is 1 (which means the onshake triggered to send the message). If seismic activity is detected, it displays and sounds a warning; if not, it clears the screen and stop the sound.
Once you have added the code, download it onto the Microbit that will act as the 'Seismic Alert'.