In this lesson, you will learn about conditional statements and how to use them to make decisions in your code. You will create a simple project to reinforce your understanding of if, elif, and else statements.
Then you will create a Dice Roller project using what you've just learnt.
Conditional statements are used to make decisions in your code. The simplest form of a conditional statement is an if statement. It checks if a condition is true and executes the code inside the block if the condition is met.
Here's a basic example of an if statement:
if 5 > 3:
    display.show('5 is greater than 3')
In this example, the condition being checked is whether 5 is greater than 3. Since this condition is true, the code inside the block will execute, and the micro:bit will display the message '5 is greater than 3'.
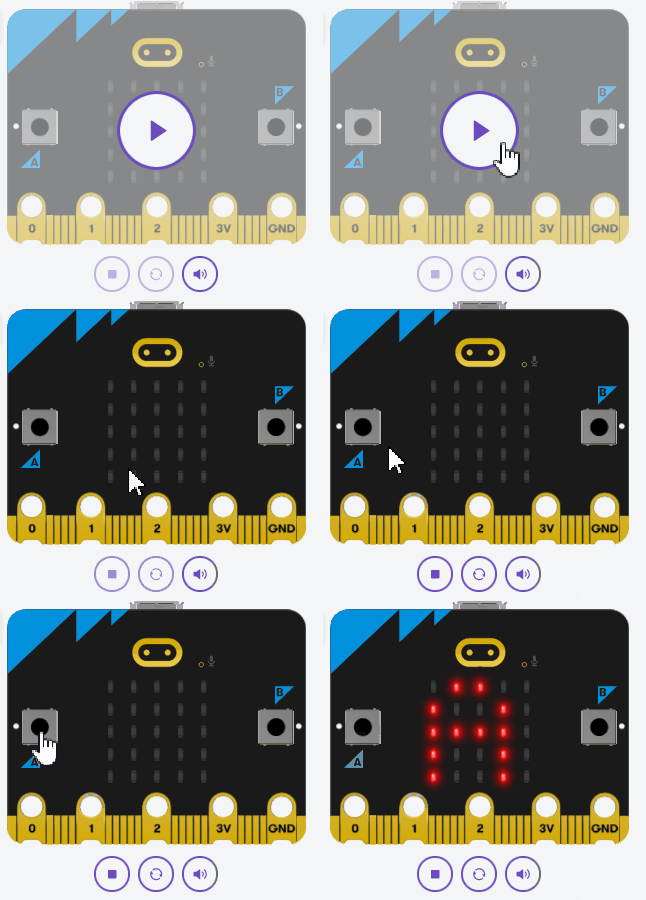
let's create a simple if statement using MicroPython. This if statement will check if button A is pressed and display the letter 'A' on the micro:bit's LED screen.
Open up the Microbit Python Editor and add the following code to the editor:
from microbit import *

while True:
	if button_a.is_pressed():
		display.show('A')
This code imports the necessary micro:bit library and creates a loop that runs indefinitely. Inside the loop, we use an if statement to check if button A is pressed. If it is, the micro:bit will display the letter 'A' on its LED screen. If button A is not pressed, the loop will continue without displaying anything.
if statement.To create a new Python project for a Microbit, open the website python.microbit.org.
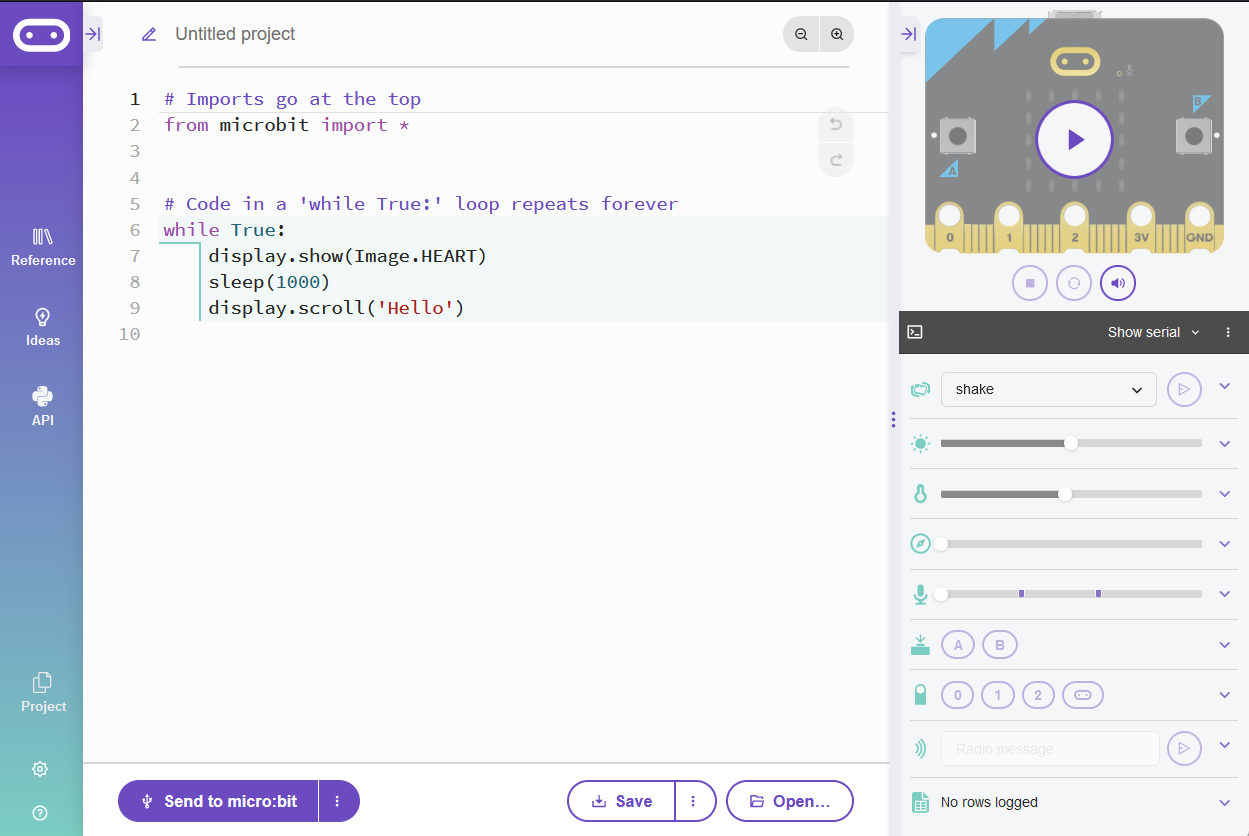
This will open the code editor with a new project. It might have some example code already added such as:
# Imports go at the top
from microbit import *

# Code in a 'while True:' loop repeats forever
while True:
    display.show(Image.HEART)
    sleep(1000)
    display.scroll('Hello')
You should delete this code except for the import line that you will need. This imports the necessary libraries you will need to code a microbit.
# Imports go at the top
from microbit import *Let's will learn about elif and else statements in MicroPython. These statements are used with if statements to create more complex decision-making structures in your code.
An elif statement, short for 'else if', is used to test multiple conditions in a sequence. If the if statement condition is not met, the program moves to the elif statement and tests its condition. If the elif condition is met, its associated code block is executed. You can have multiple elif statements in a sequence, and the program tests each one in order until it finds a met condition.
Here's an example:
temperature = 14

if temperature < 0:
    display.scroll("It's freezing!")
elif temperature < 10:
    display.scroll("It's cold!")
elif temperature < 20: # this condition is true
    display.scroll("It's mild!") # so this code will run
An else statement is used at the end of an if-elif sequence to provide a default action when none of the previous conditions are met. The code block associated with the else statement is executed if none of the conditions in the if and elif statements are met.
Here's an updated example, notice that the else goes in at the end after all the if and elif statements:
temperature = 25

if temperature < 0:
    display.scroll("It's freezing!")
elif temperature < 10:
    display.scroll("It's cold!")
elif temperature < 20:
    display.scroll("It's mild!")
else: # none of the above conditions are true, so this else will be triggered
display.scroll("It's warm!") # this code will runNow let's create some code that uses if, elif, and else statements to display different messages on the micro:bit when buttons A and B are pressed.
The elif statement is used to check for an additional condition if the previous if statement is false. The else statement is used to execute a block of code when none of the previous conditions are met.
Add the following code to the editor:
from microbit import *

while True:
    if button_a.is_pressed():
        display.show('A')
        sleep(1000)
    elif button_b.is_pressed():
        display.show('B')
        sleep(1000)
    else:
        display.clear()
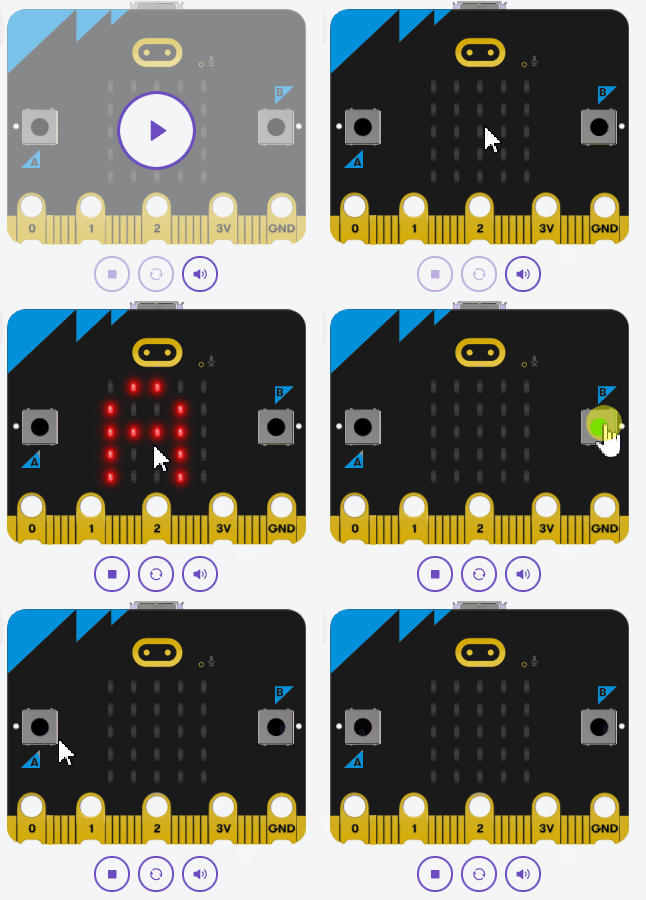
Inside the while True loop, the program checks if button A is pressed. If it is, the letter 'A' will be displayed on the micro:bit for 1 second. If button A is not pressed, the program moves to the elif statement and checks if button B is pressed. If button B is pressed, the letter 'B' will be displayed for 1 second. If neither button A nor button B is pressed, the else statement will execute, and the display will be cleared.


