Python Computer Science
Beginner
40 mins
Teacher/Student led
+40 XP
What you need:
Chromebook/Laptop/PC

Flask Framework Introduction

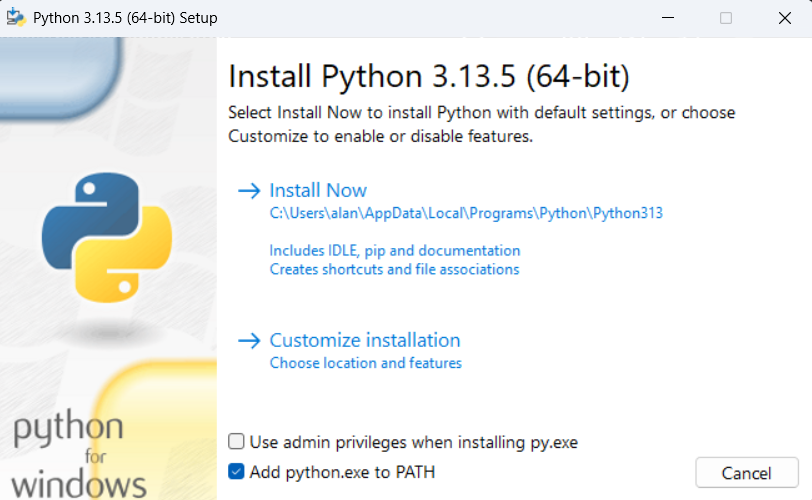
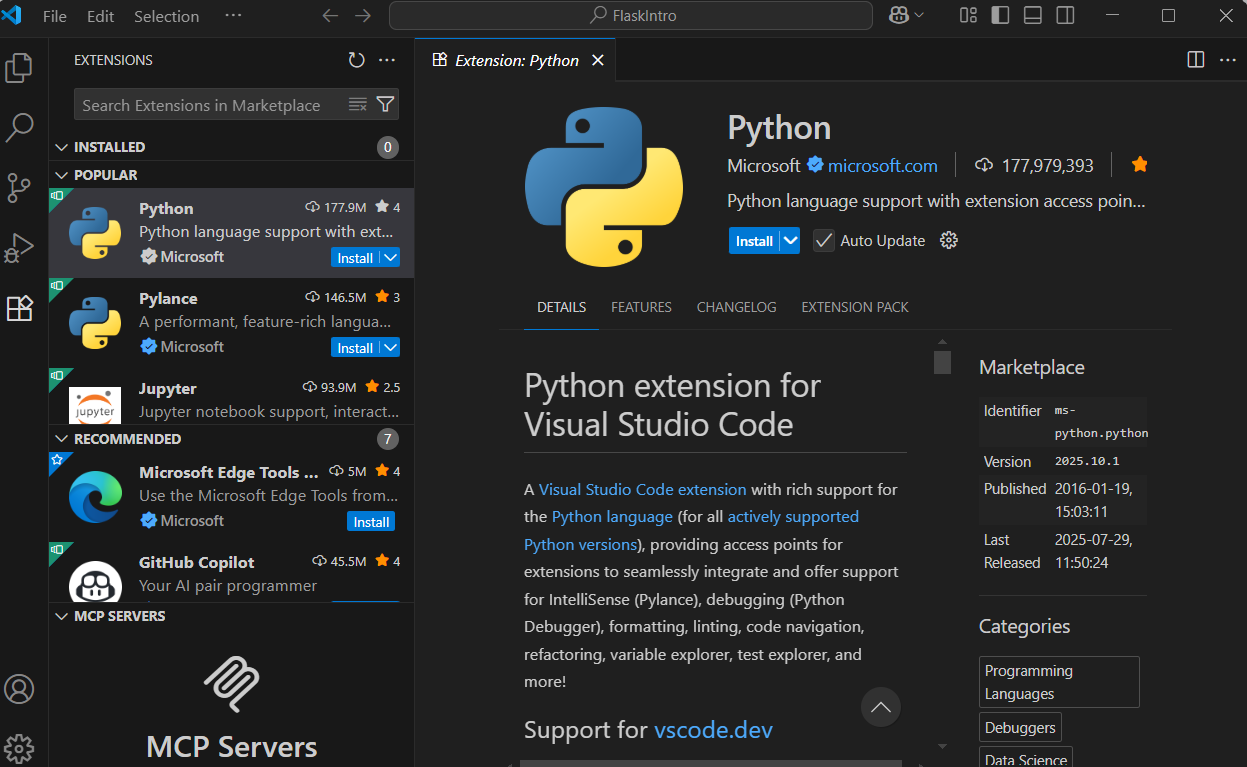
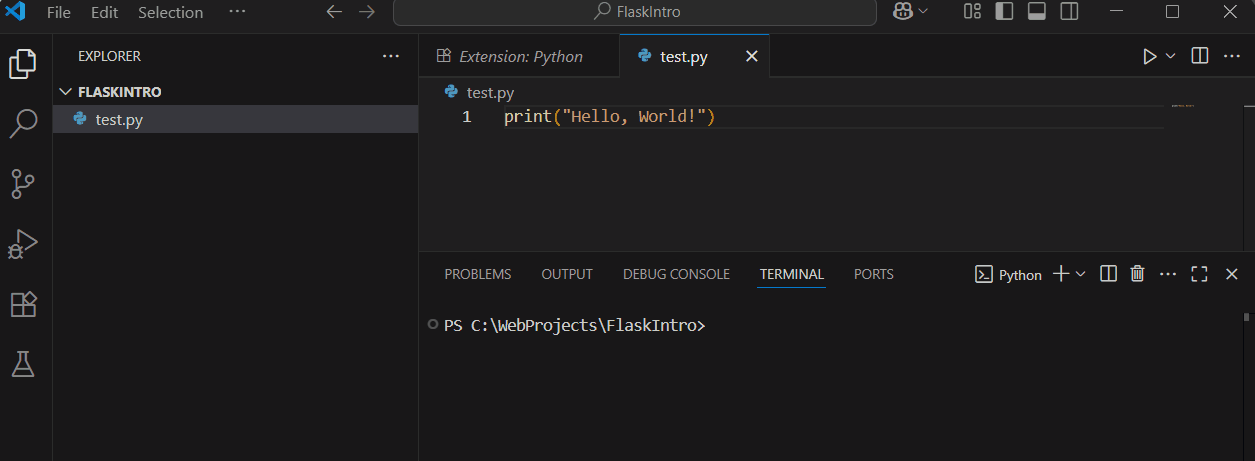
Get started with the Flask framework in this hands-on lesson. You'll set up your development environment in VS Code, install Flask, and build a simple web application with basic routes to understand how Flask works.
Learning Goals Learning Outcomes Teacher Notes

Live Class Feed

This is a live feed of the latest activity by your students on this lesson. It will update in real-time as they work on the lesson.
Load previous activity

    1 - Introduction

    In this lesson, you'll dive into Flask, a lightweight Python framework for building web applications. You'll gain practical skills in web development by setting up your environment and creating a simple app from scratch. Here's what you'll be learning and doing:

    1. Set up your development environment in VS Code, including installing Python and creating a project folder.
    2. Install Flask using a virtual environment to manage dependencies effectively.
    3. Build a basic web application with routes, including dynamic ones that accept arguments for personalised responses.
    4. Run and test your app in a browser, understanding how to start, stop, and debug the server.

    By the end, you'll have a solid foundation in Flask and be ready to develop more complex web projects.

    2 - Installing Python on Your Computer

    First, you need to ensure Python is installed on your computer. If you already have Python installed, you can skip to the next step. Otherwise, follow these instructions:

    1. Visit the official Python website to download the installer: Python Downloads.
    2. Download the latest version for your operating system (Windows, macOS, or Linux).
    3. Run the installer and make sure to check the box that says 'Add Python to PATH' during installation.
    4. Once installed, open a command prompt or terminal and type python --version to verify it's installed correctly. You should see the Python version number.

    This setup ensures you can run Python code on your machine.

    If you're on Windows and running python --version opens the Microsoft Store, or shows a message like "Python was not found; run without arguments to install from the Microsoft Store, or disable this shortcut from Settings > Apps > Advanced app settings > App execution aliases.", instead of showing the version, this is due to the Microsoft Store alias interfering. To disable it:

    1. Open Windows Settings (press Windows key + I).
    2. Go to Apps > Apps & features.
    3. Search for 'Manage app execution aliases' or navigate to it directly.
    4. Find the entries for 'python.exe' and 'python3.exe' and toggle them off (they might be listed under "App Installer").
    5. Close the settings and try running python --version again in the command prompt.


    3 - Setting Up VS Code for Python

    Now that Python is installed, let's set up Visual Studio Code (VS Code) to work with Python. If you don't have VS Code installed, download it from the official website: VS Code Download.

    1. Open VS Code.
    2. Go to the Extensions view by clicking the Extensions icon in the Activity Bar on the side (or press Ctrl+Shift+X).
    3. Search for 'Python' in the Extensions Marketplace.
    4. Install the official Python extension by Microsoft.
    5. Once installed, reload VS Code if prompted.

    To test, create a new file named 'test.py', type print("Hello, World!"), save it, and run it by right-clicking in the editor and selecting 'Run Python File in Terminal'. You should see 'Hello, World!' in the terminal.

    This prepares VS Code as your coding environment for Python projects.


    4 - Create a Project Folder

    Before we start building our Flask application, you need to create a dedicated folder for your project. This will help keep everything organised.

    1. On your computer, create a new folder named 'FlaskIntro'. You can do this in your Documents folder or any location you prefer.
    2. In VS Code, go to File > Open Folder and select the 'FlaskIntro' folder you just created.
    3. This will set 'FlaskIntro' as your workspace, where you'll add files and code for this lesson.
    With your project folder set up, you're ready to proceed to creating a virtual environment in the next step.

    5 - Create the Environment

    Before installing Flask, it's good practice to create a virtual environment. A virtual environment is like a separate, isolated space on your computer for your Python project. It allows you to install and manage packages (such as libraries) specifically for this project without interfering with other Python projects or the main Python installation on your machine. This helps avoid version conflicts and keeps things organised.

    Project dependencies are the external packages or libraries that your code relies on to work properly. For example, in this lesson, Flask is a dependency because your web app needs it to run.

    With your 'FlaskIntro' folder open in VS Code:

    1. Open the Command Palette by going to View > Command Palette.
    2. Type 'Python: Create Environment' and select it from the list.
    3. Choose 'Venv' as the environment type (this creates a standard virtual environment).
    4. Select your installed Python version as the interpreter.
    5. VS Code will create a folder named '.venv' in your 'FlaskIntro' directory. This may take a moment.

    Unlock the Full Learning Experience

    Get ready to embark on an incredible learning journey! Get access to this lesson and hundreds more in our Digital Skills Curriculum.

    Copyright Notice
    This lesson is copyright of DigitalSkills.org. Unauthorised use, copying or distribution is not allowed.
    🍪 Our website uses cookies to make your browsing experience better. By using our website you agree to our use of cookies. Learn more