Microbit Python Computer Science
Beginner
40 mins
Teacher/Student led
What you need:
Chromebook/Laptop/PC or Microbit

Digital Dice Roller

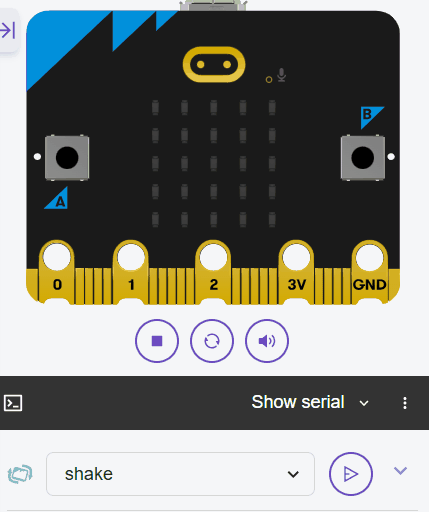
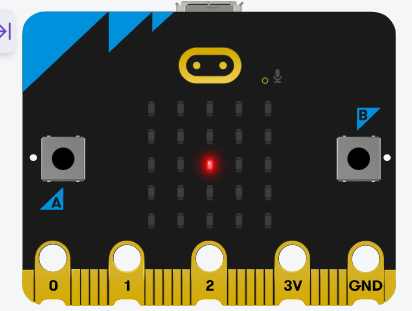
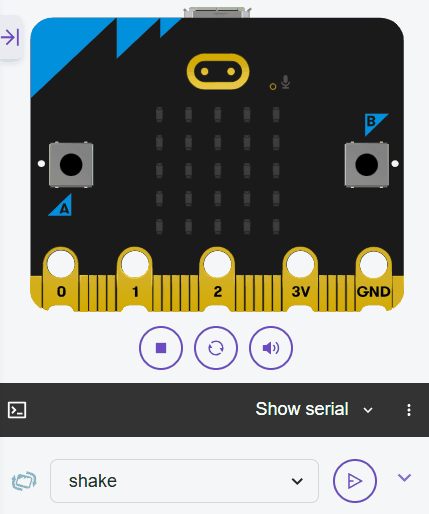
In this lesson, you'll build a digital dice roller with a Micro:bit using Python. Follow step-by-step instructions to code shake detection, random number generation, and LED displays, creating a fun, interactive project from scratch.
Learning Goals Learning Outcomes Teacher Notes Lesson Files

Live Class Feed

This is a live feed of the latest activity by your students on this lesson. It will update in real-time as they work on the lesson.
Load previous activity

    1 - Introduction to the Project

    In this lesson, you'll create a digital dice roller using the Micro:bit. This interactive project simulates rolling a traditional six-sided dice. By shaking the Micro:bit (or using the simulator's shake button), it will generate a random number from 1 to 6 and display it as a pattern of dots on the LED display, just like the face of a real dice.

    You'll use Python to handle shake detection, random number generation, and image display, building skills in programming logic, loops, and functions. By the end of this lesson, you'll have a fun, working dice roller that you can use or expand upon.

    Open the Micro:bit Python editor at python.microbit.org and start a new project.

    Remember to test your code frequently by running it in the simulator. Shake the virtual Micro:bit by clicking the shake button in the simulator.

    2 - Import Modules

    In this step, we'll import the necessary modules. We need the microbit module for hardware access, including the accelerometer and display, and the random module to generate a random dice roll.

    Start by adding the following complete code to your editor:

    from microbit import *
    import random
    This imports everything from microbit and the random module. Run the code; nothing will happen yet, but it should run without errors.
    If you see any import errors, check your spelling and ensure you're using the online editor.

    3 - Define Dice Faces

    Next, we'll create a list to store the dice faces as images. Each face is an Image object representing the dots for numbers 1 through 6 on a dice. Lists are perfect for holding these related items, and we'll use this list to select a random face later.

    Update your code to the following complete version:

    from microbit import *
    import random
    
    dice_faces = [
        Image('00000:' '00000:' '00900:' '00000:' '00000'),  # 1 - single dot in the center
        Image('90000:' '00000:' '00000:' '00000:' '00009'),  # 2 - dots in top-left and bottom-right corners
        Image('90000:' '00000:' '00900:' '00000:' '00009'),  # 3 - dots in top-left, center, and bottom-right
        Image('90009:' '00000:' '00000:' '00000:' '90009'),  # 4 - dots in top-left, top-right, bottom-left, and bottom-right corners
        Image('90009:' '00000:' '00900:' '00000:' '90009'),  # 5 - dots in four corners and the center
        Image('90009:' '00000:' '90009:' '00000:' '90009')   # 6 - three rows of two dots each (left and right positions)
    ]
    
    display.show(dice_faces[0])
    Run the code. You should see the image for '1' on the display. This confirms the list is set up. The list dice_faces holds six Image objects.
    Try changing the index in display.show(dice_faces[3]) to show '4'. This practises accessing list elements. Note: Images are strings representing brightness levels (0-9) for each LED in the 5x5 grid.
    To save time, it's ok to copy and paste this code but make sure you understand what it is doing.

    4 - Detect Shake Event

    Now, let's detect when the Micro:bit is shaken using the accelerometer. We'll use a loop to continuously check for the 'shake' gesture.

    Update your code to this complete version:

    from microbit import *
    import random
    
    dice_faces = [
        Image('00000:' '00000:' '00900:' '00000:' '00000'),  # 1
        Image('90000:' '00000:' '00000:' '00000:' '00009'),  # 2
        Image('90000:' '00000:' '00900:' '00000:' '00009'),  # 3
        Image('90009:' '00000:' '00000:' '00000:' '90009'),  # 4
        Image('90009:' '00000:' '00900:' '00000:' '90009'),  # 5
        Image('90009:' '00000:' '90009:' '00000:' '90009')   # 6
    ]
    
    while True:
        if accelerometer.was_gesture('shake'):
            display.scroll('Rolling!')
        sleep(100)
    Run the code. Shake the virtual Micro:bit in the simulator, and you should see 'Rolling!' scroll on the display. The loop continuously checks for the shake gesture.
    This uses the accelerometer's was_gesture method, which is a control structure for event detection. Test it multiple times.

    5 - Animate Rolling Dots

    To make it feel like a real dice roll, we'll add an animation using a loop to show a sequence of images that simulate rolling dots.

    We'll define a list of animation frames and loop through them when a shake is detected.

    Update your code to this complete version:

    from microbit import *
    import random
    
    dice_faces = [
        Image('00000:' '00000:' '00900:' '00000:' '00000'),  # 1
        Image('90000:' '00000:' '00000:' '00000:' '00009'),  # 2
        Image('90000:' '00000:' '00900:' '00000:' '00009'),  # 3
        Image('90009:' '00000:' '00000:' '00000:' '90009'),  # 4
        Image('90009:' '00000:' '00900:' '00000:' '90009'),  # 5
        Image('90009:' '00000:' '90009:' '00000:' '90009')   # 6
    ]
    
    animation = [
        Image('00900:' '00000:' '00000:' '00000:' '00000'),
        Image('00000:' '00900:' '00000:' '00000:' '00000'),
        Image('00000:' '00000:' '00900:' '00000:' '00000'),
        Image('00000:' '00000:' '00000:' '00900:' '00000'),
        Image('00000:' '00000:' '00000:' '00000:' '00900')
    ]
    
    while True:
        if accelerometer.was_gesture('shake'):
            for frame in animation:
                display.show(frame)
                sleep(100)
            display.clear()
        sleep(100)
    Run the code and shake. You should see a dot moving down the display, simulating rolling. The for loop iterates through the animation list, showing each frame with a delay.
    This reinforces loops for animation. Try adjusting the sleep time to change the speed.

    Unlock the Full Learning Experience

    Get ready to embark on an incredible learning journey! Get access to this lesson and hundreds more in our Digital Skills Curriculum.

    Copyright Notice
    This lesson is copyright of DigitalSkills.org. Unauthorised use, copying or distribution is not allowed.
    🍪 Our website uses cookies to make your browsing experience better. By using our website you agree to our use of cookies. Learn more