Arts Digital Art
Intermediate
60 mins
Teacher/Student led
85 points
What you need:
Chromebook/Laptop/PC or iPad/Tablet

Creating basic shapes

Discover the fundamentals of creating basic shapes in digital art using Photopea. Learn to use various tools such as the shape, ellipse, polygon, and rectangle tools. Master the art of creating perfect circles, squares, rectangles, and triangles. Explore additional shape tools and practice your skills with fun projects.
Learning Goals Learning Outcomes Teacher Notes

Live Class Feed

This is a live feed of the latest activity by your students on this lesson. It will update in real-time as they work on the lesson.
Load previous activity

    1 - Introduction

    Shapes are the basic building blocks of any artwork, including digital art. Whether you are creating a simple logo or a complex illustration, you will need to start with shapes. Shapes help to define the structure and layout of your artwork, and they can be used to create patterns, textures, and depth. 

    There are several tools and techniques for creating shapes in digital art. The most common tools include the shape tool, ellipse tool, polygon tool, and rectangle tool. Each of these tools has its own unique features and functions. Additionally, many digital art software programs also offer the ability to create custom shapes using the pen tool or the brush tool.


    2 - Exploring Basic Shape Tools

    In Photopea, there are various basic shape tools available that can be used to create shapes for your designs. These tools can be accessed from the toolbar on the left side of the workspace. Some of the basic shape tools include the rectangle, ellipse, polygon, line, and custom shape tools. Each of these tools has different options and settings that can be adjusted to customize the shape as per your requirements.


    3 - Creating a Perfect Circle

    To create a perfect circle in Photopea, follow the steps below:

    1. Select the Ellipse Tool from the toolbar on the left side of the workspace.
    2. Click and drag on the canvas to draw a circle.
    3. Hold the Shift key on your keyboard while dragging the mouse to constrain the shape to a perfect circle.
    4. Release the mouse button to create the perfect circle.

    You can also adjust the size and color of the circle using the options available in the properties panel on the right side of the workspace.


    4 - Creating a Square or Rectangle

    To create a square or rectangle in Photopea, follow the steps below:
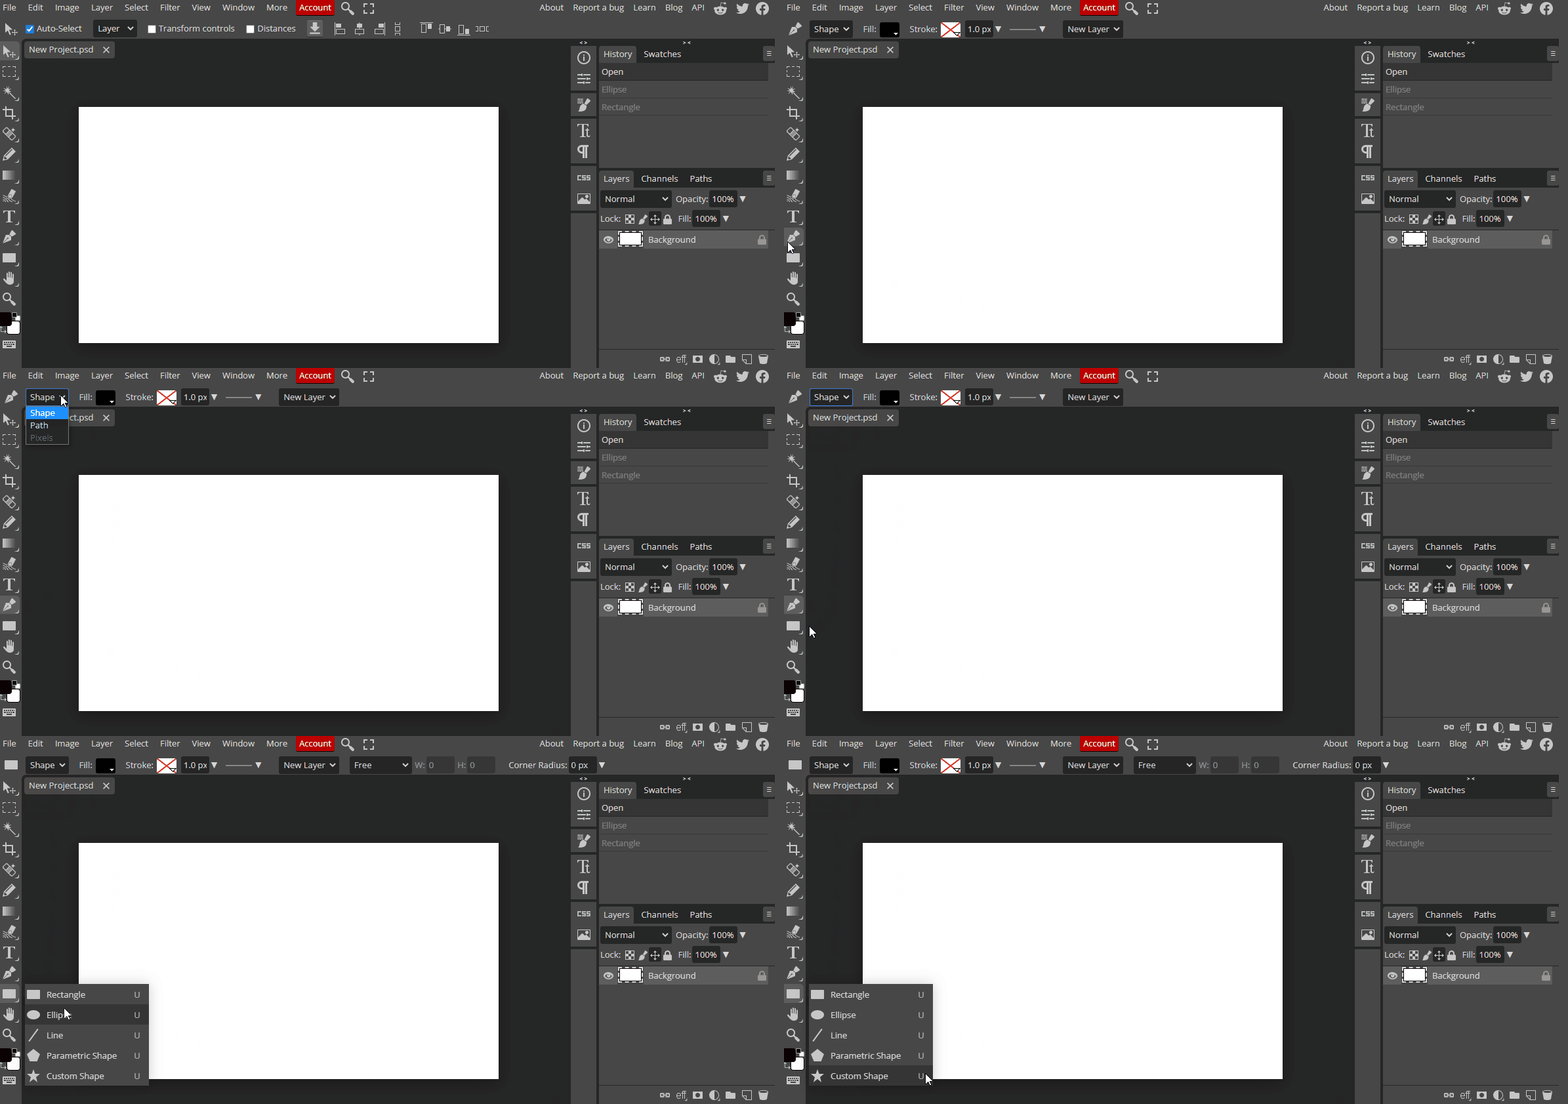
    1. Select the Rectangle Tool from the toolbar on the left side of the workspace.
    2. Click and drag on the canvas to draw a rectangle.
    3. Hold the Shift key on your keyboard while dragging the mouse to constrain the shape to a square.
    4. Release the mouse button to create the square or rectangle.

    5 - Creating a Triangle

    To create a triangle in Photopea, follow the steps below:
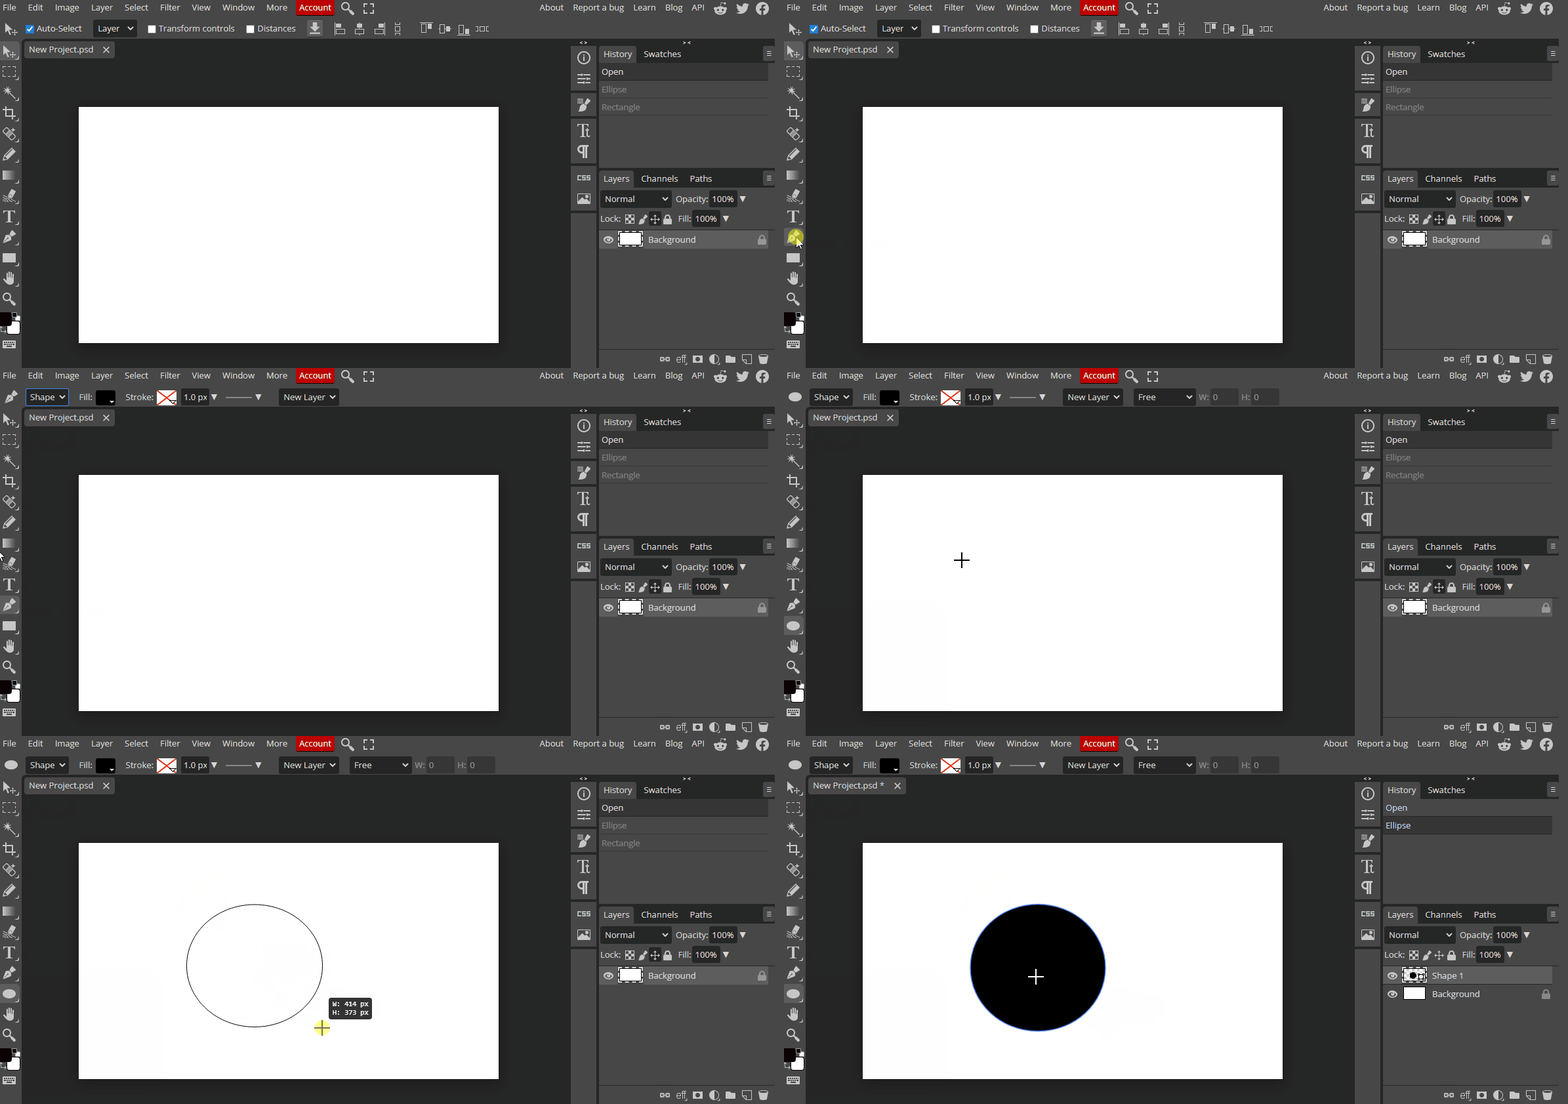
    1. Select the Polygon Tool from the toolbar on the left side of the workspace.
    2. Click on the canvas to open the Polygon Tool settings.
    3. Enter "3" in the "Sides" field to create a triangle.
    4. Click "OK" to close the settings.
    5. Click and drag on the canvas to draw the triangle.

    Unlock the Full Learning Experience

    Get ready to embark on an incredible learning journey! Get access to this lesson and hundreds more in our Digital Skills Curriculum.

    Copyright Notice
    This lesson is copyright of DigitalSkills.org. Unauthorised use, copying or distribution is not allowed.
    🍪 Our website uses cookies to make your browsing experience better. By using our website you agree to our use of cookies. Learn more