Microbit
Beginner
10 mins
Teacher/Student led
45 points
What you need:
Chromebook/Laptop/PC
Microbit
Traffic Lights Kit
Phillips Screwdriver

Build your Traffic Lights

In this lesson, you'll assemble your own traffic lights using a Microbit Traffic Lights Kit. You'll start by gathering your materials, then open the package and construct the stand. Finally, you'll attach the Microbit to the traffic lights, ensuring the correct alignment.
Learning Goals Learning Outcomes Teacher Notes

Live Class Feed

This is a live feed of the latest activity by your students on this lesson. It will update in real-time as they work on the lesson.
Load previous activity

    1 - What you need

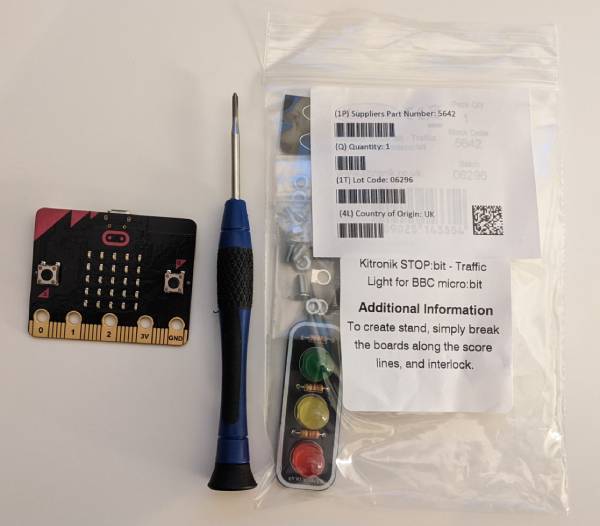
    You will need the following:

    1. Your Microbit Traffic Lights Kit
    2. A Microbit
    3. A Phillps head screwdriver

    2 - Open up the package

    Open the Microbit Traffic Lights package and take out the contents.


    3 - Make the stand

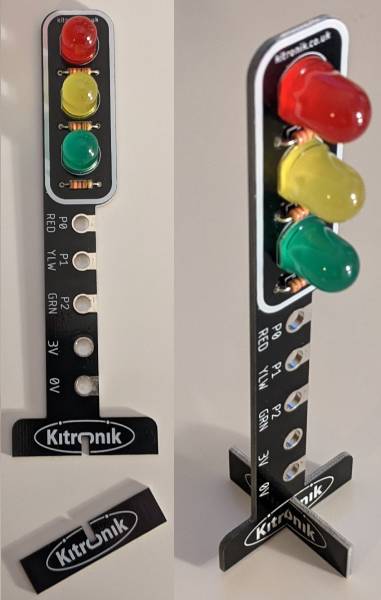
    There is a bottom part of the stand that you can snap off. Carefully snap this off and then slot it into the matching part so that it makes a stand.


    4 - Screw on the Microbit

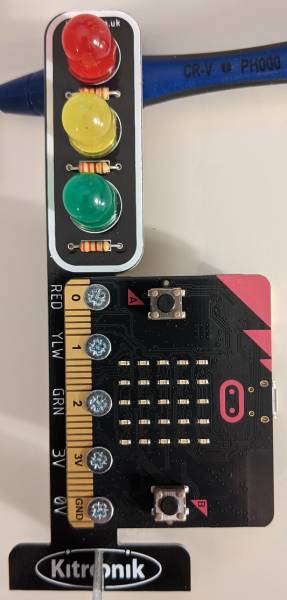
    Put the Microbit on top of the traffic lights and line up the holes as follows:

    • P0 Red > 0
    • P1 YLW > 1
    • P2 GRN > 2
    • 3V > 3V
    • 0V > GND

    Once you have lined them up as above, use your Phillips head screwdriver to attach the screws and bolts in the holes.

    That's it, you're done!


    Unlock the Full Learning Experience

    Get ready to embark on an incredible learning journey! Get access to this lesson and hundreds more in our Digital Skills Curriculum.

    Copyright Notice
    This lesson is copyright of DigitalSkills.org. Unauthorised use, copying or distribution is not allowed.
    🍪 Our website uses cookies to make your browsing experience better. By using our website you agree to our use of cookies. Learn more